Pages

Sunday, 29 March 2020

Ink & Share Scrapbook Blog Hop - March - Ribbon


Welcome to Ink & Share Scrapbook Blog Hop featuring Ribbon...
You may be starting the hop with me or have just hopped over from Sue McDonald
Wow, this theme had me stumped... I have heaps of ribbon BUT am never quite sure
what to do with it...So I stuck to what I think ribbon is mostly used for...
Tying into bows and threading through things...


Tonight layout is using the NEWEST products from Stampin' Up!
These products have been released early to Demonstrators from the upcoming
Brand New Catalogue due out on June 4th.

I have used the Ornate Garden DSP.
Ornate Garden Border Dies
Ornate Garden Ribbon in Terracotta Tile and Old Olive.
Ornate Garden Gilded Gems.
Label Me Lovely Punch
I also used
AND a couple of  Sale-A-Bration Free products
Tags in Bloom and So Very Vellum Specialty Paper.

My layout has no photo on it as I need to get photos printed as per usual.

For Christmas I received a Styling Session at Taking Shape in Cairns
from my Beautiful Daughter...
Now anyone that knows me, knows that I don't get all dressed up.
My wardrobe does need making over so away we went...
Well there were lots of tears, then some smiling and then some laughing.

So I will add one of my favourite photos from the Styling Session on this layout.

I do hope you like it, I did use some ribbon BUT not very much.
Hopefully I will learn some new ways to use ribbon when I have finished this blog hop.


Can you see the Embossed Vellum die cut with the
Ornate Border Dies on top of the Ornate Garden DSP


Up next is Rebecca-Jo Unwin, this the 2nd night in a row that Rebecca has followed me on
the Blog Hops that we choose to participate in...


Roll Call


If you LOVE Scrapbooking like me, follow the link to purchase the PDF's for
Come Sail Away Scrapbooking Layouts - Released on April 1


http://studioshabazcreativeme68.blogspot.com/p/scrappin-on-go.html


Use the Shop Now button to purchase any of these products featured tonight.
Please use March Host Code 24767ADZ at the bottom of your Shopping Cart,
You will receive Free Product from me with a Handmade Card.
Thank you for visiting my Blog today, as always I ask for you to show me some Lovin'
in the form of a comment...I really do appreciate you taking the time.
Cheers Shaz

Ink.Stamp.Share March Blog Hop - Let's Hear It For The Boys


Welcome to Ink. Stamp. Share Blog Hop for the Month of March.
I don't know about you BUT I think it has been Mad March!!!
We are here to showcase Let's Hear It for the Boys...
So let's take our mind off of current events and set your eyes upon these gorgeous creations

created by 13 fellow Stampin' Up! Demonstrators.

You may have joined me from Sue McDonald's Blog 
My name is Sharon Dalton (Shaz) and I love to Scrapbook
so I am sharing my latest layout with you all tonight...
Using the products from Come Sail Away Suite in the current catalogue.
This suite is PERFECT for Boys to Men.
Unfortunately I don't have any photos to put on it yet!!

I started with a Whisper White 12 x 12 Cardstock and used the co-ordinating
coloured cardstock that matches the suite...Night of Navy!!! One of my fav's.
Next I cut up some of the Balmy Blue Stripe from the DSP and put it along the bottom
and finished it off with some Soft Suede rope dies...

I cut 4 photos mats from Whisper White Cardstock and centred them
over the A4 Night of Navy cardstock.
I stamped Set Sail in the direction of your dreams and
then punched it out and added it to the middle of the 4 photos...
I am still able to put photos right to the edge of the mat as the adhesive is in the middle.


I used some of the banner stickers from Memories & More Card pack
at the top RHS side of the layout and some more of the Soft Suede rope.
Next I used one of the Come Sail Away Memories & More Cards, trimmed it down. Stamped this card with the lighthouse and birds, I will be able to use this for journalling.
I matted this journalling block with Balmy Blue  <3

This layout is so very basic, BUT it is perfect for the Men in my life <3

Shitty photos sorry...Will take photos on the camera tomorrow...Just finished the layout!!
9pm so I am off to bed..


Up next is Rebecca-Jo Unwin with her project <3


https://rebecca-jounwin.blogspot.com/2020/03/ink-stamp-share-blog-hop-march-2020.html?


If you LOVE Scrapbooking like me, follow the link to purchase the PDF's for
Come Sail Away Scrapbooking Layouts - Released on April 1


http://studioshabazcreativeme68.blogspot.com/p/scrappin-on-go.html


Thursday, 26 March 2020

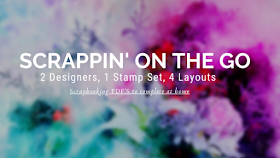
Scrappin' On The Go - 2 Designers - 1 Stamp Set - 4 Layouts


Today, I have a sneak peak for you....
I have teamed up with a fellow Queensland Stampin' Up! Demonstrator Vicky Wright
Together we are creating a Monthly Scrapbooking PDF Tutorial.2 Designers, 1 Stamp Set, 4 Layouts
 
This PDF is perfect for the beginner Scrapbooker OR
to those of you who are experienced and have been Scrapbooking for years...
NO experience necessary. 
If you have never scrapped before, then why not start with us! 

We want you to begin getting those photos sitting in boxes,
on your computer or phone INTO ALBUMS
We have been working on this for a while now and it will go LIVE on April 1.These Tutorials are for you to create in your own home, whenever you want.

Each month we will share with you 4 pages created with the same SU! supplies,
ie Stamp Set, Designer Series Paper(DSP), Dies, etc.* 
You will be able to use them as a single page or double page layout for your albums. 
That’s 4 x 12” x 12” Pages each month! 
YES!  If you are a Stampin’ Up!® Demonstrator,
you are able to use them for your classes. 
This means that all the work is done for you.

April is all about the Come Sail Away Suite
This Suite is perfect for everyone, holidays, beachy days, etc. 
Each page has been created so that you are able to create in a couple of hours,
over the weekend or away on retreat with you!


The tutorials include a List of Products required for all pages,
Measurements – Metric & Imperial with Step by Step Instructions.

3 Options available –
Option 1 –
  • PDF Tutorial Only –  Worldwide
  • $15AUD
Option 2 –
  • PDF Monthly Subscription –  Worldwide
  •  $10AUD
  • Cancel at anytime
Option 3 –
  • FREE –  Australian Residents ONLY
  • With $50AUD purchase
  • Team Members
  • When joining my Team
Come scrap with us!  To subscribe or to purchase these tutorials,
head over to the Scrappin’ On the GO! 


All the products listed in the Tutorials will all be available for purchase through my
Online Store
Log into the link, sign up as a customer and order your products...
With any purchase over $50 from my Online Store, you will receive FREE PDF.
Please use March Host Code 24767ADZ at the bottom of your Shopping Cart,
You will receive Free Product from me with a Handmade Card.


* If you don't have these products you can substitute with what you already own

Thank you for visiting my Blog today, as always I ask for you to show me some Lovin'
in the form of a comment...I really do appreciate you taking the time.
Cheers Shaz

Thursday, 19 March 2020

Scrapbooking Global March Blog Hop - Black & White Photo


Welcome to Scrapbooking Global March Blog Hop where our NEWEST
Creative Design Team Member Ma
ï Chapelain
gets to challenge us with her Blog Hop theme of Black & White photo...
There are 13 Blog Hoppers this month...
So lots of inspiration, to get us through this uncertain time ahead during
the self-isolating to ease the increase of people coming into contact with Coronavirus.  

I do hope that you are all well and your family are well too.
Happy Scrappin' in the coming days and weeks <3
You may be starting the hop with me or you might have hopped from Sherry Roth's blog


Immediately I was drawn to creating a layout with an old photo...
BUT I decided against that for this layout...I chose to scrap this lil cutie.
I babysit my cousin's daughter once a fortnight for 2 days and 1 night.
So she gets to do things that she doesn't normally do at home....
For instance collecting the eggs from the chickens at Pop's...

Well you see Pop,
he is my Dad <3  He is 77, an old country boy from way back. 
Well Dad calls a spade a spade and he speaks his own unique language..
You will see from the title of this layout...
So try to understand his language when you see it!!!
He calls eggs....BUMNUTS!!!


I have used a couple of the patterned papers from Pleased As Punch DSP
from the Co-ordination range of products that co-ordinate
with our Mini and Sale-A-Bration catalogues.

My base cardstock is 12 x12 Blushing Bride from the Subtles Range of Cardstock,
which I have stamped with background stamp All Wired Up in Gray Granite ink.
All DSP measurements will be at the bottom of the Blog Post.

No real techniques used to create this layout, just products from our wonderful
Mini Catalogue and our Annual Catalogue

First up I used the Full of Happiness Stamp Set (it has a chicken and egg)
This stamp would be great for Easter...
I used So Saffron ink pad for the chicken and then it's legs I used Crushed Curry ink pad on whisper white cardstock which I hand cut out.
Next I used Highland Heather ink pad for the egg on whisper white cardstock,
and I stamped offon some scratch paper for the lines on the egg.
I did have to redo the lines again so re-inking and stamping off again.
I used Tuxedo Momento ink for the eyes of the chicken and Crushed Curry for the beak.
This stamp makes the chicken look so life like... Love it!!


You can co-ordinate this stamp set with Dino Dies to cut out your half eggs
BUT I hand cut them as they are really easy to cut.

I used the Sale-A-Bration Small Blooms Punch with the co-ordinating DSP
for all the flowers on the layout...


My Title is created with DSP from Tropical Oasis DSP using Lined Alphabet Stamp set
and matching Layering Alphabet dies...I stamped them with Pool Party ink
and then die cut them out.
My smaller word underneath my title is created with Make A Difference Stamp Set
using Highland Heather Ink pad and then I punched it out with Classic Label Punch
I used the Triple Banner Punch to create my banners out of the DSP.

So here is the finished layout... Hope you enjoyed all my sneak peaks..


Up next is Maï Chapelain with her version of Black & White Photo.
Click on the NEXT button to follow along with the Blog Hop 

If for some reason this link is broken there is a complete list of Blog Hoppers down below


Here are the dimensions of all my Cardstock and DSP
12" x 12" Blushing Bride Cardstock from the 12" x 12" Subtles Cardstock range

All the following pieces are cut from Pleased As Punch DSP
Stripe - 12" x 4 3/4"
Pink Gingham Banners - 11 1/4" x 1 1/4" AND 10 1/4" X 1 1/4"
Left Hand Side Pink Gingham Banner 3 3/4" x 1 1/4"

Floral Banner 10.5" x 1 1/2"Green - 7 1/2" x 6"

 Bumnut Title was cut from Tropical Oasis DSP
Have an AWESOME day and I cannot wait to see what you say about my layout.
Please leave me some LOVIN in the form of a comment and I will do the same in return.
Cheers Shaz

Sunday, 8 March 2020

Colour Combo Blog Hop March 2020


Welcome to Colour Combo Blog Hop March 2020, this month our colour palette is
 Blushing Bride,
Melon Mambo and Crushed Curry.
It was a combination that worried me for a little while...
You are currently at Shaz's Blog BUT you may have just popped over from Rochelle's Blog

We have 21 participants in this Blog Hop so lots of colour inspiration to inspire you.


I began to think what colour palettes are in our Designer Series Paper...
YAY!!! Mosiac Mood Speciality DSP has Blushing Bride and Crushed Curry.
I had a solution...I would just have to add a small accent of Melon Mambo.


I don't know about you BUT I mostly always start with my photos and
then design my layout to suit or co-ordinate elements that will compliment them.

I also wanted to use the Shimmer Detailed Laser-Cut Specialty Paper as I was
using Wedding photos so I wanted to add a lil bit of elegance to the layout.

This layout is made up solely of Papers, Fussy-cutting, Die-cutting and Dimension.


Firstly I cut up my Shimmer Detailed Laser-Cut Specialty Paper, so not to waste it.
I am known to cut away the middles of my layers of cardstock and dsp.
I stuck down the RHS of the laser-cut paper and then I cut a piece
of Blushing Bride cardstock almost 5 1/2" wide by A4 length.
Stuck that over the top of laser cut paper.
Added my 3 photos to that, evenly spaced over the whole sheet.


Next I cut some Crushed Curry cardstock 5 3/4 x 8 1/4  for the other side of my layout.
Then I cut a piece of Mosiac Mood DSP the same size as CC cardstock.
I stuck these 2 pieces together on a bit of a diagonal.
Next I added my piece of Melon Mambo, BUT I didn't like the brightness of it so I added a piece of Petal Pink Perennial Essence Vellum over it to soften the colour...
Again sticking them on a diagonal so you only got to see a hint of the colour.
Stuck that to Crushed Curry Cardstock/DSP layer.
Next I added the other side of the Shimmer laser-cut paper over the photos
on my Blushing Bride piece.  When you are sticking this Shimmer laser-cut down over
photos make sure you only use tape on the very edge of the photos...
I never use glue on or near my photos...
The laser-cut paper is not adhered to my photos.
Then I added my final layer of Mosiac Mood DSP underneath my LHS photo...

I cut up the Floral Mosiac Mood DSP for the flowers and butterflies on the layout.
I slipped them in and around and over the different parts of my layout
BUT never sticking to my photos, just stuck them on the side of the photos.
I layered them with dimensionals to give it a bit of height.


I wanted to add some more of the Melon Mambo BUT I didn't want it overpowering
the layout so I decided to try something to see if it would work and it did!!!

I used a piece of Melon Mambo cardstock stuck my double sided tape
(I buy generic DS tape) to it and then I added a layer of our Vellum cardstock
to see if you could see the adhesive underneath....
So I ran that through the die cutting machine with the Stitched Be Mine Dies
to cut out some hearts, it worked perfectly....


So I kept the piece that all the hearts come out of and used it on my layout.
I stuck the vellum and the MM cardstock hearts to the shape and stuck it on the layout...
Added a few extra hearts here and there.

So here is the finished layout, I do hope that it inspires your to try this colour combo.


 Up next is Jo Blackman


Thank you for hopping along with us today, I would LOVE it if you could leave
me some LOVIN in the form of a comment in the box below.


Roll Call

4.     Sandra Roberts (UK)
5.     Jenn Petersen (CAN)
9.     Sharon Dalton - YOU ARE HERE
10.                        Jo Blackman (UK)
11.                        Gez Carpenter (UK)
12.                        Melinda Whittington (Australia)
13.                        Tricia Butts (U.S.A.)
14.                        Sue Allen - Australia
15.                        Jill Chapman - (UK)
16.                        Caroline Peck - (US)
17.                        Kristie Wilson - (US)
18.                        Rebecca-Jo Unwin (AU) 
19.                        Cheryl Taylor (UK)
20.                        Anastasia Radloff (US)
21.                        Kimberley Morris (US)