

Hello to you all, Thank you for joining us again for another Blog Hop
This month the theme is Celebrations includes Birthdays, 4th of July, Red White & Blue, Weddings, Babies, Parties, etc.
You may have just joined me or you hopped on from Kris's blog,
I know that Kris will have created a beautiful project with Serene Garden
I have something very special to share with you all <3
Sooo I have a friend having Twin Boys within a week or so...
I had to create something for them, so Babies it is!!!
I decided to create a Shhh babies sleeping sign on a canvas.
I knew straight away that I would use Twinkle Twinkle Suite on pg 82
in the new Annual catalogue...The DSP is so stunning <3
In the month of July you can buy 3 packs of DSP and receive one FREE
I also had to have the Little Twinkle Stamp Set and
Twinkle Builder Punch.
I brought the Canvas from our cheap shop, so I think it cost me $2.
Spread Mog Podge liberally over the whole surface even the sides
so that I could stick down the paper
to the canvas so that it won't lift way from the surface
like it does if you are only using tape in various parts.
 I cut the paper larger than the canvas
and stuck it to the Mod Podge smoothing out any bumps.
Then cut the corner of the paper and folded them underneath.
in the new Annual catalogue...The DSP is so stunning <3
In the month of July you can buy 3 packs of DSP and receive one FREE
I also had to have the Little Twinkle Stamp Set and
Twinkle Builder Punch.
I brought the Canvas from our cheap shop, so I think it cost me $2.
Spread Mog Podge liberally over the whole surface even the sides
so that I could stick down the paper
to the canvas so that it won't lift way from the surface
like it does if you are only using tape in various parts.

and stuck it to the Mod Podge smoothing out any bumps.
Then cut the corner of the paper and folded them underneath.
Then I used a retired mask with Stars all over it.
Next I used Shimmery White Embossing Paste
and Night of Navy Classic Stampin' Ink Refillmixed it together on the Silicon Craft Sheet, used a palette knife to
add some stars randomly over the page.
I stuck them together with Mini Stampin' Dimensionals
then I added some paste to it...Had to wait for it to dry then.
Next I stamped out SHHH with Letter for You Stamp Set
then cut out the letters with the Large Letters Framelits
on one of the beautiful DSP's from Twinkle Twinkle.
I used Mini Stampin' Deminsionals to stick these down.

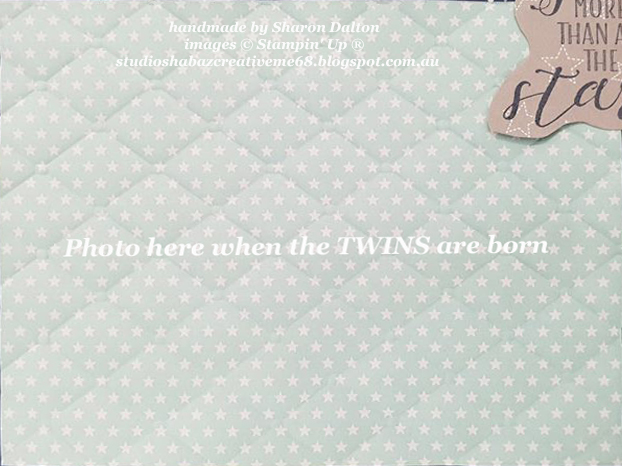
Then I cut another Mint coloured DSP from Twinkle Twinkle
for an embossed photo mat with the Tufted Textured Impressions Embossing Folder.
I sprayed it lightly with a light spray of water to soften the fibres
and ran it through the Big Shot...Ohh it is so pretty...Don't you agree?
Next I used the Lined Alphabet Stamp Set to stamp
SLEEPING onto Stars DSP from Twinkle Twinkle.
Then I hand cut out this word and stuck it to the bottom of the canvas
with our Multipurpose Liquid Glue
I stamped the word Brother from Thoughtful Banners Stamp Set, then used the S
from So Much to make the word 'Brothers' added it beneath Sleeping word.
Lastly I added Love you more than all the stars and added
it to the corner of the photo mat...leaving the corner unstuck so that
I can add a photo of the Twins when they are born soon!!!
Then I will give it to their parents as a Baby present...

Up next is Tricia Butts, she will have something pretty amazing
to share with you using Broadway Birthday set.

Thank you for hopping along with all 9 of us and
I hope you are inspired to create something
similar or exactly the same <3Please leave me some love in the comment box
below and I will in turn return the favour to you <3
Hope your day was AWESOME <3
If you need a Demonstrator here in Australia, I
am your girl.
All products can be brought through my online store.
All purchases over $50 will receive a FREE gift from me
Please use hostess code 6FJKRK6B
If you happen to order over $250 please do not use the hostess code
as you will receive 10% of sales to spend as hostess rewards.
All products can be brought through my online store.
All purchases over $50 will receive a FREE gift from me
Please use hostess code 6FJKRK6B
If you happen to order over $250 please do not use the hostess code
as you will receive 10% of sales to spend as hostess rewards.
All
Products used to create this project
Twinkle Twinkle Designer Series Paper - 146284
Little Twinkle Stamp Set - 146452
Twinkle Builder Punch - 146321
Shimmery White Embossing Paste - 145645
Night of Navy Classic Stampin' Ink Refill - 103033
Night of Navy Classic Stampin' Ink Refill - 103033
Silicon Craft Sheet - 127853
Mini Stampin' Dimensionals - 144108
Multipurpose Liquid Glue - 110755
Letter for You Stamp Set - 141968 Large Letters Framelits - 141712
Tufted Textured Impressions Embossing Folder - 146335
Big Shot Die-cutting Machine - 143263
Lined Alphabet Stamp Set - 145908
Thoughtful Banners Stamp Set - 141614
If you wish to Join me and become a Stampin' Up Demonstrator
Join here
If you wish to Join me and become a Stampin' Up Demonstrator
Join here
July is the best month to join...
You will receive 10 FREE Classic Ink Pads valued at $117
as a BONUS. See flyer below
You will receive 10 FREE Classic Ink Pads valued at $117
as a BONUS. See flyer below

Designer Series Paper Buy 3 Get 1 Free


