Wednesday 4 September 2024

Let's Craft Together -Sept 2024 - CASE The Catalogue Challenge


Thank you for joining us for this month’s Let’s Craft Together blog hop. We are a group of
multi-cultural Stampin’ Up!® demonstrators in Australia who have developed a strong friendship though our love of stamping and our admiration of each other’s style of crafting.


This is my 1st Blog Hop with these talented demonstrators.
Each month, one of us takes turn to set a blog hop challenge,
where we share our creativity with others through our blog hops.
Be sure to hop along to them all, for lots of creative inspiration.
You may have joined me from Nancy's Blog


It is Julia Quinn's turn to challenge us this month.
She has chosen CASE The Catalogue Challenge, which is soo cool
as today the Stampin' Up! Mini Catalogue went LIVE to everyone.

I just had to use my FAVOURITE Suite out of this catalogue, Regal Winter.
Check out page 34 &35, look at those GORGEOUS colours.
BUT I won't be CASEing any of those cards, instead
I will be CASEing the large white card in the middle of pg 62.


I don't own that stamp set that is featured so I used the floral images of Regal Flora.
The card pictured has very light background image stamped with Smoky Slate ink
then stamped florals in Memento Ink and images coloured with blends.

So I chose to use Bubble Bath Ink for the flowers
and 2nd generation Pretty Peacock Ink for the leaves.
I decided to step it up a notch by adding flowers stamped in Berry Burst Ink
and diecut these 3 flowers with complimentary Regal Foiled Adhesive Dots.
I chose to use the same Forever Plaid 3D Embossing Folder in the background.
Layered that directly to the Basic White Cardbase.

I die cut 2 separate label tags from the Regal Winter 12" x 12" Designer Series Paper and
Regal Distressed Patterns 12" x 12" Specialty Designer Series Paper
and then cut them to size to add the sentiment.  Look at the detail on that die.


AND you have another border outline die to use on another project,
see what I did with that at the end of this post.

Added the sentiment from Textured Floral with Versamark and
White Embossing Powder on the Pretty Peacock Designer Series Paper.
Behind the "Birthday Blooms for you" sentiment I used the ribbon
that comes as part of this AMAZING Regal Winter suite collection.
It is just so regal - Blackberry Bliss and Gold Textured Ribbon.

I added a couple of stamped images on the envelope to continue the flow of this card
from the outside of the envelope right through to the insert of the card.
I used the "Wishing I was there to give you a hug" sentiment with Pretty Peacock Ink.


I hope you liked my CASEd card..Coming up next in the Blog Hop is Michele

Make sure you keep hopping to see LOTS of amazing inspiration.
Be sure to hop along to the other blogs in this hop for more creative inspiration and to see how the other Design Team Members interpreted this challenge. Click on the names below.


All Supplies used in this project are linked at the end of the post.
These products can be purchased in my
Stampin' Up! ® online store

I want to say a HUGE THANKS to you who visit my blog <3 
I really do appreciate you leaving me some Lovin' in the form of a comment.

Being CREATIVE is not a hobby it is a way of life

Cheers Shaz


Thursday 22 August 2024

NEW at SU - August Blog Hop - Elevated Embossing


Welcome to New at SU! -  Elevated Embossing.
You may have joined me from Angie's Blog

This was such a HUGE challenge, I was trying to do something unique.
BUT once I started searching I realised that Double Embossing
with layers and depth were where I wanted my card to go.

I used Silver Foil and Changing Leaves Hybrid Embossing Folder
As well as the Cross Hatch embossing folder from the Basic Embossing Folder collection.
Night of Navy Cardstock and White Embossing Powder.
AND 2 Silver & White Ribbons.

I started by embossing the Silver Foil within the Changing Leaves Hybrid Embossing Folder with the Dies on the inside.  This Embossing folder has such defined Leaf design and
3 beautifully textured leaves that are die cut.

I chose the Largest leaf to put inside the Cross Hatch embossing folder so that I could get
the look of double embossing on just one of the leaves.

Now to bring it all together...

I layered the embossed layer onto the Night of Navy cardstock and
pieced back in the other 2 leaves that were cut by the die. 
The Largest Leaf that is double embossed layer I chose
to add dimensionals only on a couple of the leaves and the other ones I stuck directly
to the Night of Navy layer.

I also used Embossing powder on my Congratulations sentiment.

Then I added the Night of Navy layer to a Basic White Card layer.
Can I tell you how hard it is to photograph metallic card.
Lastly I added 3 Silver & White Ribbons to the stem.
Silver and White Sheer Ribbon
White Glittered Organdy Ribbon cut the middle to create a thinner ribbon.
AND lastly Silver 1/8" trim combo.


Up Next is Rachael Coon

Please be sure to follow the rest of the participants by clicking on the list below.
Hop all the way around and leave some LOVIN' in the form of a comment.

All Supplies used in this project are linked at the end of the post.
These products can be purchased in my
Stampin' Up! ® online store

I want to say a HUGE THANKS to you who visit my blog <3 
I really do appreciate you leaving me some Lovin' in the form of a comment.

Being CREATIVE is not a hobby it is a way of life

Cheers Shaz

Friday 16 August 2024

Stampin' Around The World Video Hop - Water - Playing In The Rain


Sneak Peak


Welcome and Thanks for hopping along with us via YouTube.

  Stampin' Around The World Video Hop,
is a group of Stampin' Up! Demonstrators from all over the world getting together monthly to create a project that fits a theme.
We then video how we have created our project.

This month our theme is WATER....
Simple right, well I struggled with what to create.
Then I thought to myself KISS - Keep It Simple Sharon.
 I chose a stamp that I had in my stash since last year's catalogue
that hadn't even seen ink.


Products I used were
Playing In The Rain Stamp 
Fluid 100 Watercolour Paper
Night Of Navy Cardstock
Basic White Cardstock

I really did KISS, by using Stamps, Ink and Water
Video Tutorial can be found here, You will see 2 versions at the end of the video.

I used the fine tip Water Painter and Soft Pastels to colour in the character & umbrella.
Then I used the larger wide tip Water Painter and Balmy Blue Ink to colour behind character.
I love the fact that by simply adding more water to your background you can blend the colours you have used to colour your stamped image.

I hope you like my simple card that I created and I hope that it inspires you to try
watercolouring with our Stampin's Up! products.

 Please follow the Hop along and check out everyone's creations.

SATW August 2024 - Water
#stampinaroundtheworld #SATW
Jazzledazzlecraft with Janice - https://youtu.be/6yw2JVTv35E
Crafting with Clydene https://youtu.be/BMY-WZ6opvQ
Monica Formosa- Paper Happinessity with Monica https://youtu.be/siGmtj96I5w
BachStar Stamping with Amanda Bach https://youtu.be/Mz21eZJgbhc
Lesley Kilby https://youtu.be/JaHUvO5F9p0
Alison Primmer-Bradley - https://youtu.be/fZnaSW8bl5Y
Sharon Dalton - https://youtu.be/Ir8IybS7naA
Karen Jane Tilley - https://youtu.be/cj57hm4ZXLY
Maureen L. Gold -: https://youtu.be/EUiGqM-B1lM
Ellen Woodbridge - https://youtu.be/VHKH3RDBkGk
Heather Forgan - Stamp With Nellie - https://youtu.be/dnxJv_4o29I


 I want to say a HUGE THANKS to you who visit my blog
and comment it really means a lot to me. 
I really do appreciate you leaving me some Lovin' in the form of a comment.
 
Being CREATIVE is not a hobby it is a way of life
Cheers Shaz


Thursday 15 August 2024

Scrapbooking Global Blog Hop - 15th August 2024 - Stencils/Texture Background

 
Sneak Peak


Welcome to Scrapbooking Global Blog Hop - Aug 15th - Stencils/Texture Background.
Scrapbooking Global - Stampin' Up! FB group consists of over 11,000 members.
Some of these are demonstrators from all over the world who all LOVE to scrapbook
and document their everyday lifestyle for generations to enjoy into the future. 

We welcome anyone who wants to be inspired.
We are trying to encourage EVERYONE to join in the HOP's every month.
We prefer that you do have a Blog so that you can join the hop every month.
BUT you don't have to have a blog to participate in these monthly challenges.
You can upload a photo to the Album of the Month after 2pm AEDT.
You can JOIN Scrapbooking Global - Stampin' Up! FB group here


Please WELCOME Caz Hurst as our Guest Designer for August.
Caz is from beautiful New Zealand and she is the last of our Guest Designers
for this year.

Caz LOVES to distress her Scrapbooking layouts and grunge it up with
stencils and layering techniques.  I cannot wait to see what she has come up with for
this challenge I am sure it is going to be AMAZING.


You may have joined me from Julia Quinn's Blog ,
what an AWESOME layout that Julia created with her own handmade stencils.

I have lots of process photos BUT Blogger/Google is not playing nice and
not allowing me to upload from the computer to my blog. 
So I have upload the photos via my phone which is a PITA.
Sooo more photos will come later.


This theme I was so excited about BUT as usual I always leave everything
until the last minute, like I mean the very last day, hour and minute.
Uploading my final unedited photo at 1.59pm.


So I totally went all out on this layout and added bulk texture using multiple products
from the HUGE range that Stampin' Up! have in the Online Store.

Lots of products and I have only just finished the layout, so my plan is to get some
photographs up here and then I will come back and tell you how I created
this masterpiece...


My Daughter Kirrily even did a photoshoot of her Daughter Eloise especially for me.
Isn't she just the most adorable 20 month that you know <3


Let's talk about the process.
I knew that I wanted to use a photo of Eloise in her 1st Birthday dress.
BUT like I said I asked Kirrily to take some photos this morning for me.

Then I love the little ruffle on the sleeves of the dress. So I wanted to add stitching
to replicate the ruffle.

Lots of texture - Texture Paste, Stitching and Layering of multiple stamped and fussy cut
flowers from the Wildly Flowering designer series paper.

So SEWING was first....lucky it isn't material as I am the world worst straight stitch sewer.
(photos to follow)

Then the only 2 current stencils were the Layers Of Beauty which I own
and Enduring Beauty Decorative Masks which I am borrowing.
Sooo I chose Enduring Beauty and used Stencil 2
to just stencil the leaves with embossing paste and a palette knife
Then cleaned and dried them off straight away otherwise they will be damaged for life.

Once they were dried I used the rest of the stencils to create the floral designs in the
background with Tone on Tone colour palette.
So Wild Wheat on Stencil 1 and 5
Pebbled Path on Stencil 3
Mossy Meadow on Stencil 4 this was over the embossing paste.

Next I did Dottage with Versamark Ink so that it still appeared as if it is was
Wild Wheat ink again.

You all should know how much I LOVE fussy cutting so it would be no surprise
to you all that I cut all the flowers and leaves from the Wildly Flowering
Designer Series Paper which is currently on 15% Sale.

Using some of the DSP again I created corners for the photo to sit on.
Then stitched around them too.

I chose Early Espresso for the Mat behind my 5" x 7" photo
and I printed the photo in Black and White.


I felt like it needed some more foliage so I Textured Floral Stamp and Dies
and Thoughtful Wishes Dies to add more layers...
Lastly I added another layer of Early Espresso behind the Wild Wheat
which I also distressed.

Lastly I added some Enamel Dot Essential around the layout.

I have lots more photos BUT Blogger is not being nice.


Up next is Cheryl Taylor, she has created her layout with handmade stencils.
This will be truly unique.

I hope that you enjoy all the different layouts that have been created today.
We will be back again NEXT Month on 19th Sept with a FUN theme.

Please be sure to follow the
rest of the participants by clicking on the list below.
Hop all the way around and leave some LOVIN' in the form of a comment.

All Supplies used in this project are linked at the end of the post.
These products can be purchased in my
Stampin' Up! ® online store

I want to say a HUGE THANKS to you who visit my blog <3 
I really do appreciate you leaving me some Lovin' in the form of a comment.

Being CREATIVE is not a hobby it is a way of life

Cheers Shaz


Monday 12 August 2024

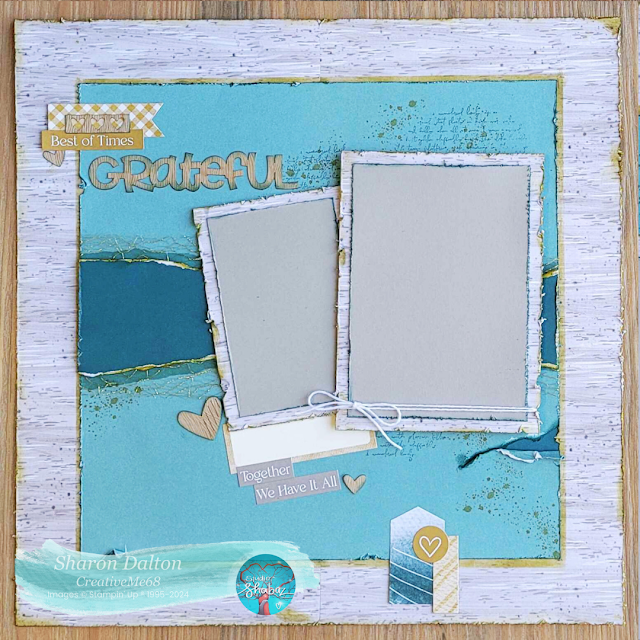
Crafty Collaborations - August Scrapbook Sunday - Season Of Green & Gold


Welcome to the Crafty Collaborations Scrapbook Sunday Blog Hop,
Crafty Collaborations is a group of Stampin' Up! Demonstrators from throughout
the world collaborating together and sharing their creative flair.
You may have joined me from
Helen - LoveADuckie Blog or
you may be starting here with me... Thank you for joining us this month.


I LOVE not having any theme or challenge for our Crafty Collaborations Blog Hop.
It allows me to choose EXACTLY what I want to create with, not having any boundries.


I chose to use the products from the Online Exclusive range offered every 2 months. 
I chose the DSP, Vellum and Cherry Cobbler and Pearl adhesive backed Berries.


I LOVED the images on Season Of Green and Gold and the Graceful Greenery Vellum


 Such a simple layout from me, BUT it is not for the feint hearted.
This layout required hours of fussy cutting because I was being a cheap skate and
said to myself I don't need the Stamp and Die to match the DSP.
Well I am really regretting that decision.

 
Using a Page Maps Sketch I followed it almost to design, the only thing I added
was the circle in the middle of the 2 photos.

I used Lost Lagoon Stampin' Write Marker for the dotted (which I suck at)
border on the left and top and the journalling panel below the photos.

I stamped the You Are Beautiful Stamp in Lost Lagoon 1st and 2nd generation stamping.
This created the wreath look behind the photos.
Then I started to stick the leaves that I fussy cut from the DSP and Vellum over
that stamped images until I filled it the shape.

Using a piece of 4" x 4" DSP to go behind the photos, then I Die-cut a white vellum layer
with the Deckled Circles Die to add over that...Sadly, you actually don't get to see much of it.

I fussy cut the bells and added them randomly on the layout.  Next were the berries.
The stamped sentiment from Greeting Of The Season.
Which was stamped on a Die-cut Deckled Circle with Real Red Classic Stampin' Pad
and then backed with a larger Deckled Circle from Real Red cardstock.

Picking a title for a layout that I have created and don't know which photos
I will be using is hard, so Thanks Google for your suggestions.
I went with All I Want...
AS that will work for almost any photos that I choose.


Up Next is Julia Quinn

I hope that you have enjoyed all the layouts that we shared with you today.
We have so many talented scrapbookers among us Stampin' Up! Demos
don't you agree with the AMAZING layouts here.

 Follow the rest of the participants by clicking on the list below.
Glad that you could HOP along with us today following the
Crafty Collaborations Scrapbook Sunday Blog Hop.


 I want to say a HUGE THANKS to you who visit my blog and comment it really means a lot to me.  I really do appreciate you leaving me some Lovin' in the form of a comment.
 
Being CREATIVE is not a hobby it is a way of life
Cheers Shaz


Thursday 18 July 2024

Scrapbooking Global - Stampin' Up! Blog Hop - Combo Layout with a Pocket Page


 Sneak Peak....


Welcome to Scrapbooking Global Blog Hop - July 18th - Combo Layout with Pocket Page
Scrapbooking Global - Stampin' Up! FB group consists of over 11,000 members.
Some of these are demonstrators from all over the world who all LOVE to scrapbook
and document their everyday lifestyle for generations to enjoy into the future. 

We welcome anyone who wants to be inspired.
We are trying to encourage EVERYONE to join in the HOP's every month.
We prefer that you do have a Blog so that you can join the hop every month.
BUT you don't have to have a blog to participate in these monthly challenges.
You can upload a photo to the Album of the Month after 2pm AEDT.
You can JOIN Scrapbooking Global - Stampin' Up! FB group here


Please WELCOME Kate Gardiner as our Guest Designer for July.
Kate does AMAZING scrapbook layouts and her style is clean and simple.
Kate has chosen the theme Combo Layout with Pocket Page.
So basically what it means is that you create a traditional page and then you also
create a smaller form 6" x 8" Pocket Page to go with it.


You may have joined me from Julia Quinn's Blog  

Julia has done a FABULOUS Double Layout with her pocket pages. 
To be truthful I really struggled to create anything that I was
happy with in my pocket pages and they are OLD Pocket Pages from Project Life.

So I opted for the easy version of a pocket page, these products are called Flip Flaps
and they are from CTMH which Stampin' Up! will soon carry in a variety of sizes...
What is a Flip Flap?  Flip Flaps are clear, self-adhesive pockets.

I have had  6" x 12" Flip Flaps in my stash so I decided to add them
to my Scrapbooking Layout that I created of our Son's Wedding.

I simply used 12" x 6" Basic White Cardstock and added some designer series paper from
Frames and Flowers Specialty Paper Pack.  Then I simply added the 3 photos onto the DSP.
To cover the adhesive strip I simple added Tear N Tape and adhered ribbon over the top.
AND tied a simple little bow.


I featured Thoughtful Journey Memories and More Card Pack which can be found on Pg 26
of our Annual Catalogue and The Thoughtful Journey 6" x 6" DSP.
Cutting the 6"x 6" DSP I was able to create a full 12" border down the right hand side,
then I added 1" x 12" Perennial Lavender DSP strip down the side too.
I used the Thoughtful Wishes Dies to cut out some leaves to accent the Memories and More
card which has "The Best Day Ever" written all over it.
Then on the small 3" x 4" card I added the date of their wedding with another leaf die
cut from the Pretty Peacock DSP which I had stamped in Pretty Peacock Classic Stampin' Ink.


The back of the Flip Flap I have left blank for the time being,
I will still continue to play with this layout to finish it off to my satisfaction.
Hope you liked my layout, Sorry for the delay of photos from my camera.


Looking forward to seeing what our next Blog Hoppers creation is...

Up Next is  Margaret Workman


I hope that you enjoy all the different layouts that have been created today.
We will be back again NEXT Month on 15th August with a FUN theme.

Please be sure to follow the
rest of the participants by clicking on the list below.
Hop all the way around and leave some LOVIN' in the form of a comment.

All Supplies used in this project are linked at the end of the post.
These products can be purchased in my
Stampin' Up! ® online store

I want to say a HUGE THANKS to you who visit my blog <3 
I really do appreciate you leaving me some Lovin' in the form of a comment.

Being CREATIVE is not a hobby it is a way of life

Cheers Shaz

New @ SU! Hop - Make It Metallic - Lifetime Of Love

  Sneak Peak


Welcome to New at SU! - July 2024- Make It Metallic.
Create a project including any kind of METALLIC element
(specialty paper, embossing, ribbon, embellishment).

This has left the gate right open, so many possibilities.

This month I have created a Faux Centre Step Card with lots of Metallic.
I used the beautiful Stamp and Die Bundle - Lifetime of Love pg 78 of Annual Catty.


A Faux Centre Step Card is an easy way to create a card without any intricate
cutting and scoring lines.  My card measurements came from Lorraine Tierney YouTube

Pretty In Pink Cardstock Base - 9" x 4 1/4" scored at 1 1/4", 2 1/2" and 5 3/4"
Unbounded Beauty DSP Layer -
4 1/8" x 3 1/8", 1 1/8" x 4 1/8"
2024-2026 InColor Glimmer - Pretty In Pink - 4" x 3", 1" x 4"

Centre Step Base - 9" x 2 1/2" scored at 3 1/2"
Unbounded Beauty DSP Layer - 2 3/8" x 5 3/8"
Basic White Cardstock Stylish Shape - Circle 2 1/8"
Basic White Cardstock Scrap for 3 Stamped Flowers -
Gold Foil Sheet - Wreath Diecut from Lifetime of Love
Nature's Sweetness Floral - Fussy Cut
2024-2026 InColor Glimmer - Pretty In Pink - Diecut Flowers (11).
Pretty In Pink Cardstock - Small Sentiment - Love You

Basic White Card Insert -
4" x 3"
2024-2026 InColor Glimmer - Pretty In Pink - 4" x 1/8"


Add all the Layers to the Card Base and Inserts
Stylish Shape Circle 2 1/8" Stamped with Forever & Always and Gold Heat Embossed.
3 Stamped and Gold Heat Embossed Flowers
Colored with Blender Pen and Pretty In Pink Classic Stampin' Pad
Gold Foil Wreath Diecut add to centre panel.
Add all the Nature's Sweetness Floral around the Gold Foil Wreath.
Add the 3 Large Flowers and then 11 Glimmer Flowers.
Lastly Stamp Love You on Pretty Pink Cardstock
AND Stamp a flower to the insert and envelope with Pretty In Pink Classic Stampin' Pad.
Adhere 2024-2026 InColor Shimmer Gems


Hope you enjoyed looking at my card design with all the metallics.


Up Next is Anke


All Supplies used in this project are linked at the end of the post.
These products can be purchased in my
Stampin' Up! ® online store

I want to say a HUGE THANKS to you who visit my blog <3 
I really do appreciate you leaving me some Lovin' in the form of a comment.
 

Being CREATIVE is not a hobby it is a way of life
Cheers Shaz