Thursday, 20 October 2022

Scrapbooking Global Oct 20, 2022 Blog Hop - Geometric Shapes


 Welcome to October 20, 2022 Blog Hop, you have joined me Shaz from Studio Shabaz
BUT you may have followed Linda Dalke to my blog


This month we have a cool theme chosen by Maï Lavidalie.
Our theme for today's Blog Hop is Geometric Shapes.

Maï actually was surprised that she had chosen this theme
as we pick them months in advance and she had forgotten.
I told her that it would be a challenge for me too <3

If you click on Maï's photo this will take you directly to her layout.


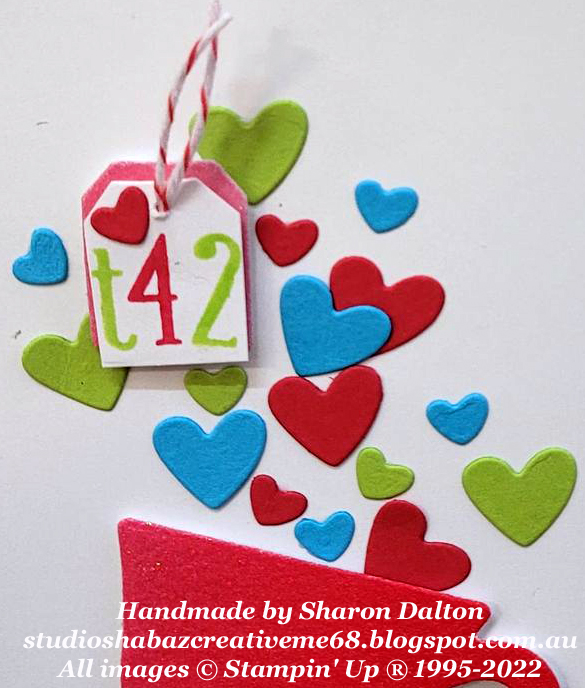
 My starting point was the square stamp from
Watercolour Shapes which I stamped in Mint Macaron.
I rotated the stamp after inking it each time to add a border to both sides of my layout,
so that I didn't get the design in the same direction every time I stamped.


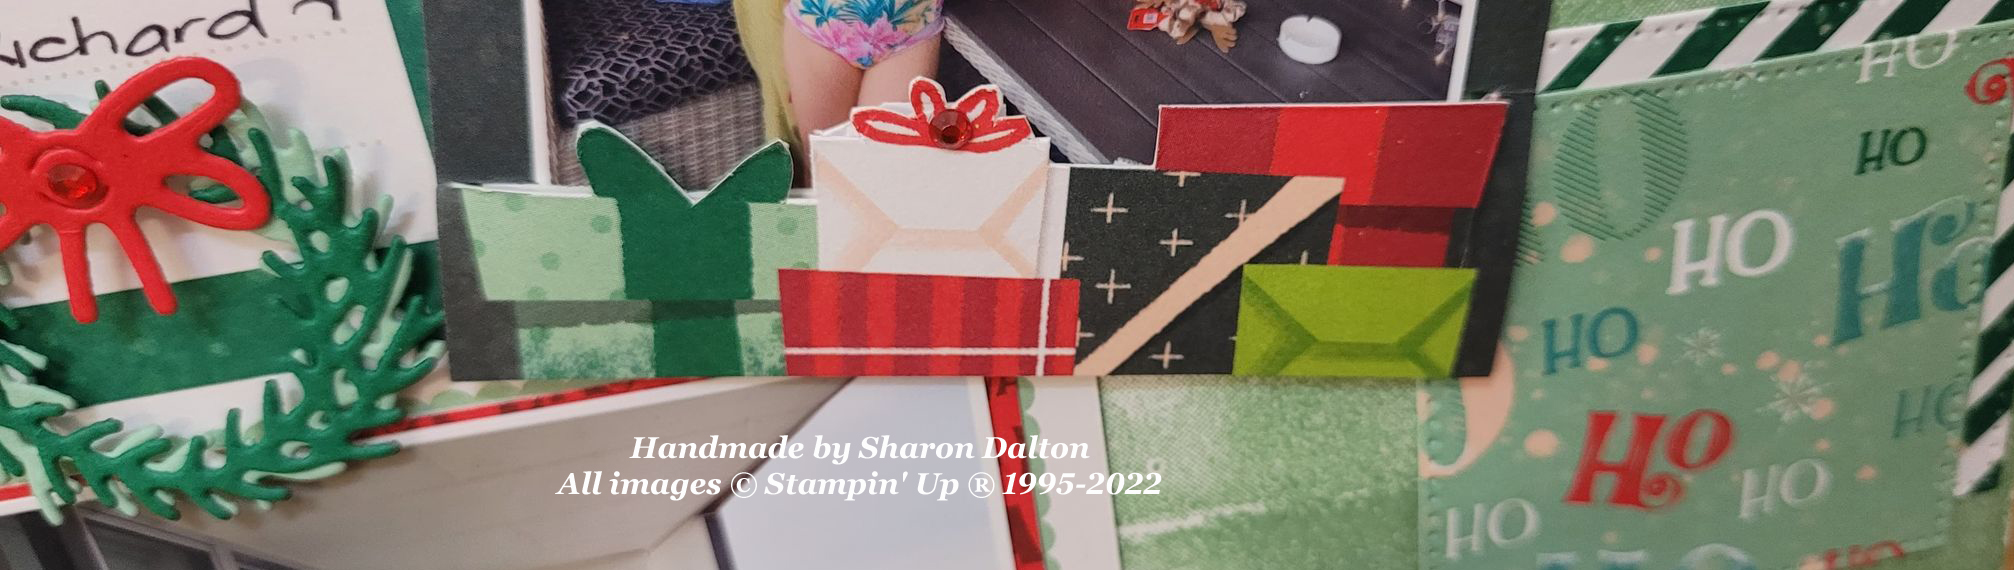
I chose to use Santa Express Memories & More Card pack from our Jul-Dec 2022 catalogue.
I wanted to solely use these cards to create a layout, as I had some left over from a class.
BUT I needed other pieces to finish the layout. 


 Once I started added bits and pieces from Santa Express DSP and the matching Santa's Train Dies to create the mini wreath seen in the photo below.


Also featured on pg 16 and 17 of the July-Dec 2022 Mini catalogue
is this delightful
Charming Landscapes Embossing Folders.
I embossed on Basic White to lay behind Mrs & Mr Claus as they were skating on ice


I also featured a returning favourite from last year's Christmas Mini,
Wonderful Snowflakes which are iridescent in colour. 


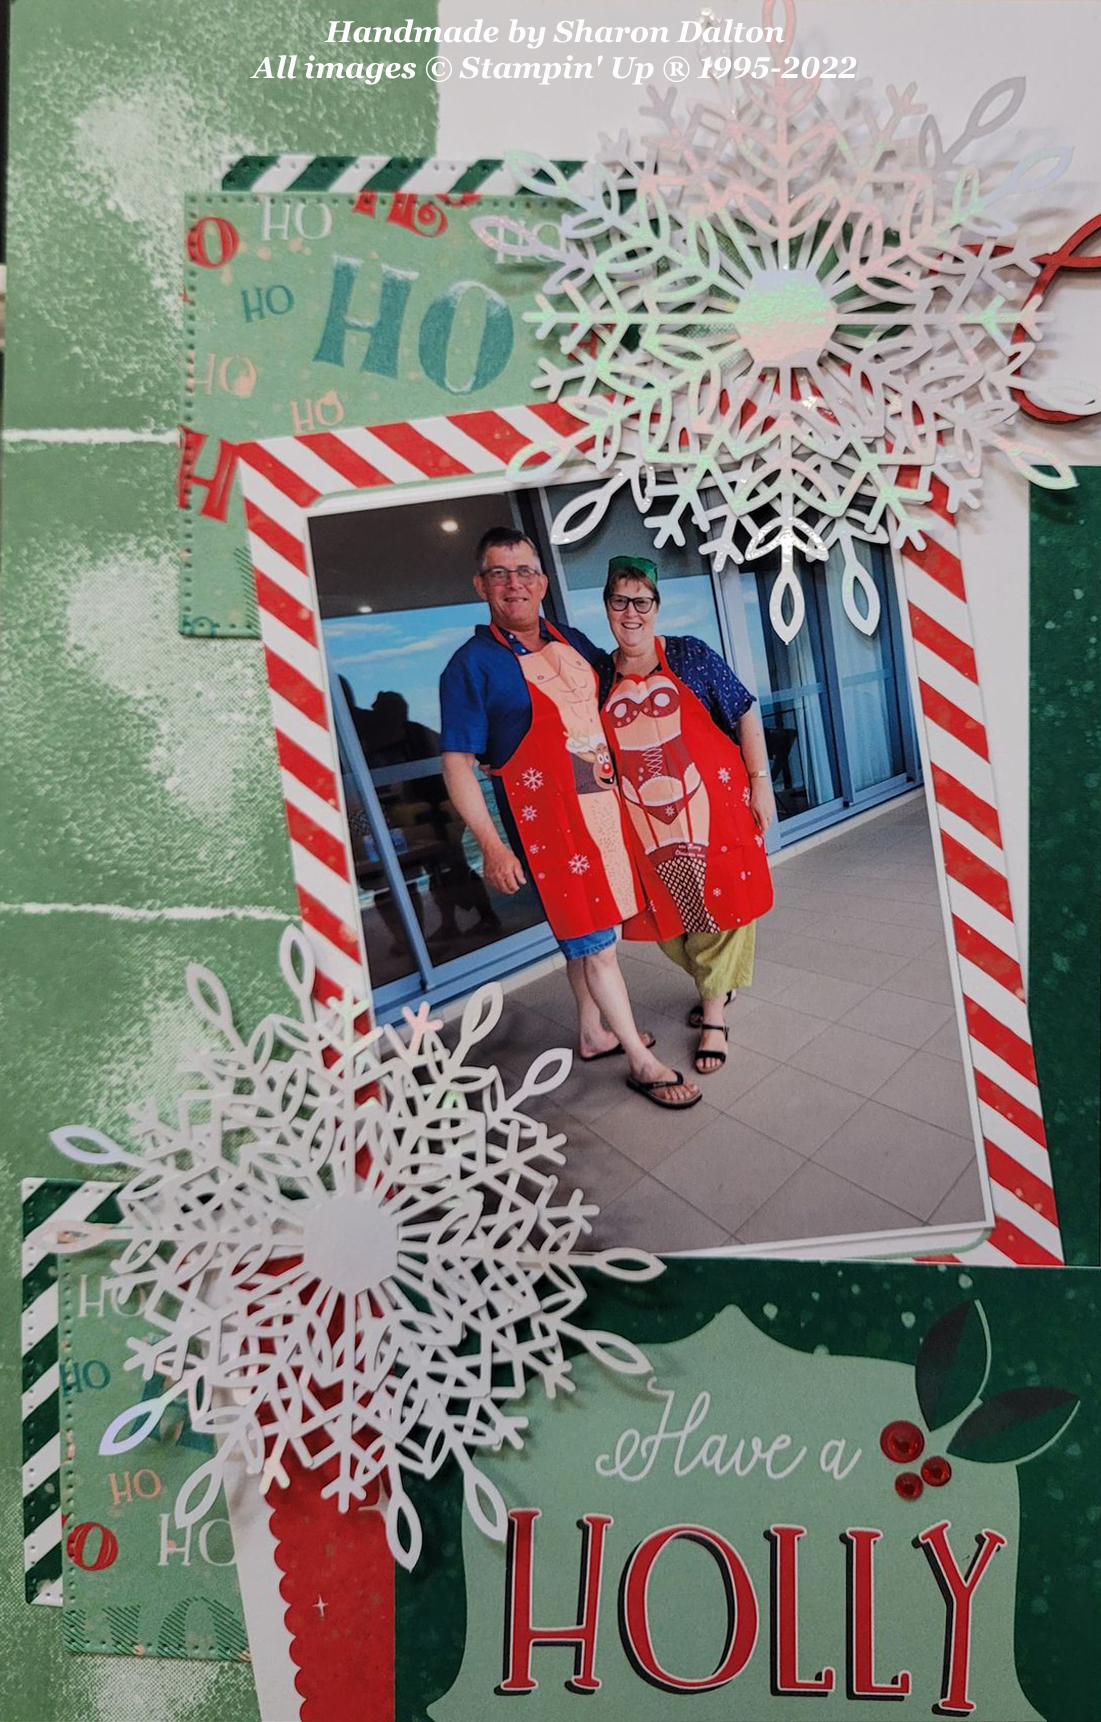
 Here is the finished layout, not much stamping on this layout.
BUT I really wanted to showcase the Memories and More Card pack.
You get 54 Double sided cards 3"x 4" and 4"x 6" cards
2 Sticker Sheets, 4 Acetate overlays and 2 laser cut sheets with
a variety of words that you can colour with your Stampin' Blends.
I used Poppy Parade Stampin' Blends on the Merry Christmas words.


 Up next is Jill Hamlett,
Jill was super organised this month as she is away on vacation today...
So she scheduled early and created a layout to suit the theme.
Unlike me who is doing it the day before....


Thank you for joining me here on this months blog hop.
Please follow on with the NEXT button and if the link is broken use the list below
to follow the blog hop full circle


Thursday, 18 August 2022

Scrapbooking Global - Stampin' Up! August Blog Hop - Tic Tac Toe

Sneak Peak


 Welcome to August Scrapbooking Global Blog Hop - Tic Tac Toe
Sherry Roth picked this theme for our hop this month...
Love that this gives us a variety of ideas to create our layout from.


We would LOVE you to join us for all the Stampin' Up! inspiration
for all your Scrapbooking needs and desires...
We have a constantly changing gallery of AMAZING creations...
If you wish to join follow this link and you will be asked 3 questions 
which you must answer to become a member.


Follow along with the Blog Hop to see what Sherry and the rest of the
Creative Design Team Members and some of the very talented members of the group
create for you for this theme of Tic Tac Toe...
Simply
choose a LINE in any direction for your choice from the Tic, Tac, Toe board.
If you didn't get a chance to join us this month you can still load them to the wall
if you were inspired by this Blog Hop.


Pinterest inspiration for my layout.


OK, onto my layout....Well I started out with Sketch, Tag & Twine.
LOL, laugh out loud because I tore my hair out this morning trying to get that line to work.
SOOOOO, I went with Tag, 3 or more Photos and Embossing.
I have a very strong disclaimer here, if you didn't already know
It's a Girl layout and LOADS of pink.

I created a Banner for the Baby Gender reveal while I was in WA in July
So I used most of the pieces off the banner to create this layout.


Like I said earlier, I used most of the pieces from the Pink & Blue banner
that I created for the Gender Reveal of our first grandchild.
I was hoping that the baby was going to be a little girl and after much waiting
it was announced that we were going to grandparents to a lil girl baby.

I used Melon Mambo cardstock for the Banners stamped with retired baby stamps.
Basic White for the Tags on the banners,
inside the tags I have left for journalling
Firstly I cut the tags and then ran them through Dotty Heart Mini embossing folders.
Stamped all the elephants from Elephant Parade Cling Stamp set.
I used some NON SU cardstock for the grass, balloon and mouse & peanuts.
I stamped the Made with Love banners from Celebrate with Tags Cling Stamp set. 

Under the Melon Mambo Banners I put 2 of photos of Lil Miss E from her 20 week scan.
She is going to be a little thumb sucker like her Mummy, she was sucking her thumb
and waving hello to her Mum and Dad while the scan was being done.

I used so many new products from the Annual &  June-Dec Mini catalogue on this layout...
I decided to
use Celebrate with Tags Heart stamp on the pink and white floral background which can be found in the Awash In Beauty DSP pack.
The other DSP is from the Hostess pack you can earn in the Annual catalogue.
It can be found on page and it is called Design A Daydream DSP....
Lots of designs to choose from, I needed something with Petal Pink to tie in with the balloon.
I used both of the Dotty Heart Mini embossing folders on this layout.
I used the same one as I did for the photo mats as I did for the Melon Mambo hearts
that are scattered around on the layout. The Die-cut Hearts are from Celebrations Tags dies.
You might not be able to see them BUT there are very cute Heart Pearls scattered over the page which come in Milky White, Glossy White and  Pearl White and 2 sizes.
The Ribbon Bows at the end of the banners are the gorgeous Glittered Organdy Ribbon.


Here is the FULL layout


Products used to create this layout
12x12 Basic White Cardstock
Melon Mambo Cardstock
12x12 Awash In Beauty DSP
12x12 Design A Daydream DSP (Hostess)
Melon Mambo Classic Stampin' Pad
Elephant Parade Bundle
Mini Pocket Envelope
Celebrate With Tags Bundle
Amazing Phrasing SAB
Glittered Organdy Ribbon
Heart Pearls

Retired Dotty Hearts Embossing Folders
Retired Baby Prints Stamp Set
Retired Little Twinkle Stamp Set


The very talented Jill Hamlett is following me on this HOP
So click on the
NEXT button to see her Beautiful creations.
And if for some reason the link is broken follow along with the list below.


 Thank you for joining us on our monthly Blog Hop,
please leave us some LOVIN' in the form of a comment
We so appreciate your visit....
Don't forget to click on the NEXT button to view all the other blogs.

Cheers Shaz


Sunday, 31 July 2022

Ink & Share Scrapbook Blog Hop - July 2020 - Shapes


Welcome to Ink & Share Scrapbook Blog Hop
This month we are featuring Shapes for July Blog Hop.
I just used triangles to create a patchwork heart in the middle of my layout.
I had seen this done before somewhere on the internet, cannot remember where.
So I thought I would give it a whirl...

I used this template to create my heart from Cardstock and DSP .


My layout is a little bit different, BUT essentially the same.
Cut numerous 2 1/2" squares cut in half to create a triangle.
I used Cardstock and DSP to work out your layout then
I laid out my pattern and took a photo...
BUT of course I changed it a few times during the course of creating the heart.


Products used
12"x 12" Basic White Cardstock
Lovely In Linen Designer Series Paper
Petal Pink Cardstock
Pale Papaya Cardstock
Sweet Sorbet Cardstock
Basic White Cardstock
Abigail Rose Designer Series Paper
Lovely & Lasting Photopolymer Stamp Set
Places In The Heart Cling Stamp Set
Fabulous Frames Dies
Lasting Label Punch
Petal Pink Classic Stampin' Pad
Pale Papaya Classic Stampin' Pad
Elegant Faceted Gems
Mini Stampin' Dimensionals
Tombow Multipurpose Liquid Glue
Mini Stampin' Cut & Emboss Machine

I created the heart first then I measured the finished heart approx 10 1/2" square.
I created a cross section in the middle and outside to the edges in light pencil.
Started sticking my triangles onto the 10 1/2" Petal Pink Cardstock from the centre out.
I trimmed the finished heart to 10 3/8" square, next I added a
10 1/2"Sweet Sorbet Cardstock to bring in the boldness of the centre panel.
(Which is where I am going to add a scan photo of my granddaughter)


Next I decided to add the border stamp in Pale Papaya Ink all the way around 
12" x 12" Basic White Cardstock with Tiles stamp from Lovely & Lasting  Stamp Set.
Stuck my Sweet Sorbet Cardstock base to my Basic White Cardstock.
Then I added the corner dies from Fabulous Frames Dies out of Sweet Sorbet.

Ohhhh just a word of warning make sure you decide to stamp on your triangles
before you stick them!!! I didn't and had a lil fun making sure that I didn't get ink
on the other triangles...I used co-coordinating ink on the cardstock with stamps
from Lovely & Lasting.

Next I stamped the Mum cradling the baby from Places In The Heart Stamp Set
onto Petal Pink cardstock in Petal Pink Ink...
Then I cut a frame from Fabulous Frames out of Basic White Cardstock
and added over the stamped image.


I also stamped the words(There are places in your heart) from
Places In The Heart Stamp Set on Basic Cardstock and then punched it out with
Lasting Label Punch then punched another label out of Pale Papaya to layer behind.

Lastly I added the Elegant Faceted Gems to finish off the layout...
Hope you liked my Shapes layout...
I just need to add the photo of the 20 week scan photo (2 weeks to go)


Thanks once again Jo Blackman for inviting me to join the group
for this month's Blog Hop... Just squeezed it in, after a HUGE weekend of crafting.
Not back for a layout that I created in 4 hrs tonight.

Up next is Rebecca Unwin, click on the NEXT button below to follow along with the
rest of the Blog Hop members...If for some reason the link is broken follow along
via the Roll Call below this graphic.


Roll Call

Jo Blackman

Cindy Mitchell-Clark

Sharon Dalton

Rebecca-Jo Unwin

Dorothea Winkler

Cheryl Taylor


 Thanks for visiting, I would LOVE it if you left me a comment below.
Have an very happy Sunday/Monday in your side of the world.
It is bedtime for me...  Cheers Shaz


Thursday, 16 June 2022

Scrapbooking Global - Stampin' Up! Blog Hop June 16 - Numbers


 Welcome to June 16th Scrapbooking Global - Stampin' Up! Blog Hop.
We are part of an online group inspiring others to use 
Stampin' Up! products in their scrapbooks.
Each month we have a theme and everyone creates a layout and writes a blog
to show how they created the layout and all the details.
If you would like to join us monthly that would be wonderful.


This month Julia Quinn is our Creative Designer from our team of 8.
I am sure that Julia will have an AMAZING layout that will include her theme NUMBERS 


My layout is not something I am totally happy with or proud of...
I actually really struggled to get anything down on paper for this theme...
The NUMBERS theme really threw me a curveball!!!

SOOOO...today at 10.30am right after Baz left to go back to work,
I thought c'mon Shaz surely you can pull a rabbit out of your hat!!
Well the RABBIT was not to be... We have a very bright layout with a few numbers on it.


Using the Cup of
Tea Bundle, as the photos were of the 2 girls (my cousin's daughters) 
on the Teacup ride at the Christmas Fair.
I stamped 3 tea cups down the side using the Masking Paper to cover the previous
tea cup so that you didn't have any overlapping pieces of the cup on the previous cup.
I stamped some of the foliage and the flowers on Basic White cardstock and die cut them.
Then I added some blending of Tahitian Tide all the way around the cups...
Ok with that done, I was truly stuck for what to do next.


I printed the photos, matted them and added some of the glimmer paper to the middle photo and played with the placement of them, before adding any more of the stamped images or die-cuts on the layout.


I was truly struggling to find what else to put on this layout.
I grabbed a product from the upcoming SAB catalogue to add a title to this layout.
Had a play on words incorporating the NUMBERS that I was struggling with.


Then I die cut lots of the little tea bags cut from 3 of the 5
2022-2024 Incolors Sweet Sorbet, Parakeet Party and Tahitian Tide 
to add accents around this layout...
I then used the Alphabest stamp to add t42 on basic white cardstock
inside the tea bags to add to them.


I hope that you like my layout a lot more than I did creating it...
Now that it is done I am liking it a whole lot more...


Up next is one of our fellow demo's from around the world who LOVES to join our
Monthly Blog Hops...  I have seen Denise's layout already and I am sure that you will
LOVE her design and her puppies

Denise Cox 


 Thank you for joining us on our monthly Blog Hop,
please leave us some LOVIN' in the form of a comment
We so appreciate your visit....
Don't forget to click on the NEXT button to view all the other blogs.

Cheers Shaz


Thursday, 19 May 2022

Scrapbooking Global - Stampin' Up! Blog Hop - Map

 Sneak Peak


 Welcome to May 19th Scrapbooking Global - Stampin' Up! Blog Hop.
We are part of an online group inspiring others to use 
Stampin' Up! products in their scrapbooks.
Each month we have a theme and everyone creates a layout and writes a blog
to show how they created the layout and all the details.
If you would like to join us monthly that would be wonderful.


It was my turn to pick what our theme was for this month.
I chose the theme Maps as I knew that I had my photos from
AUCKLAND, New Zealand.
Where I attended
OnStage 2019, it my first overseas destination.

I cannot wait to see what the other members of the hop come up with for this theme.
It proved a little more difficult than I thought it was going to be...
Firstly I started with the Kiwi and the Kangaroo from Count On Me stamp
I drew a circle on my layout and created my world map of
Gray Granite Ink Kiwi's on Smoky Slate cardstock.
Then I added the Kangaroos in Soft Suede Ink
because we all associate kangaroos with Aussies...

BUT I didn't really like them after I stamped them.

BUT it was too late, so I moved on to the next design element.

I used the NEW Fern 3D Embossing Folder to create 2 panels to go the length of the page.
I had 2 pieces of Black cardstock which I spritzed with water as this helps break down the
paper fibres and gives you more defined design of the Fern.
I run it through the Stamp, Cut and Emboss machine then I added Whisper White ink
very lightly over the entire design with a Blending Brushes.
Then I used retired Frost White Shimmer paint in a Stampin' Spritzer
to give a lil shimmer to the Black cardstock.
Very hard to show up in a photo though.


I was so happy to see that the Vellum Layering Designs had carried over into the NEW Annual Catty, as I had my heart set on it for this theme of Maps.  It has both printed Black & White Maps on the vellum which I have used on my layout.


Under the White Map Vellum I added my Qantas ticket, and then I started to build
my layout around it.  Adding layers of DSP from NEW Sun Prints DSP.
Next I added the photos which I used the now retired Blue Foils around my circular photos, which were cut with the Stylish Shapes Dies and Layering Circle Dies
The main photo was from my window seat of the beautiful waters of NZ coastline.
I matted this photo with some of the back side of the Sun Prints DSP...
So many gorgeous designs in this 12" x 12" pack of papers.


Seen as though New Zealand is known for the Silver Fern Leaf,
I used the now retired Iconic set of dies that has a beautiful shaped fern leaf
and some of the silver foil from the Blue Foils pack. 
Layering 2 on top of each other gives them that bit more depth.

I stamped 5 Kiwi's and 1 Kangaroo onto Smoky Slate cardstock, fussy cut them out
and added some Stampin' Dimensionals to my layout.

I used the NEW Alphabest Bundle to create the airport abbreviations.
The Best Label punch is just perfect for this. Small and compact.


To create the title of my page I cut 3 layers of Smoky Slate cardstock and
Sun Prints DSP and Black Map Vellum and added them to a Black cardstock.
This lettering is also now a retired product, very sad about that!!!

Behind my 11 3/8" Smoky Slate Cardstock I have added the Black Map Vellum
onto one of the pieces of white cardboard that come in the packaging of our DSP's


Up NEXT is a fellow Creative Design Team Member Julia Quinn
who will no doubt
have created a masterpiece with the Map theme.


 Thank you for joining us on our monthly Blog Hop,
please leave us some LOVIN' in the form of a comment
We so appreciate your visit....
Don't forget to click on the NEXT button to view all the other blogs.

Cheers Shaz