Monday, 28 February 2022

Ink & Share Scrapbook Blog Hop - the Letter "L"


Welcome to Ink and Share Scrapbook Blog Hop
Our theme is the Letter "L"
This month was a bit of a challenge for me...
It must have scared all the usual blog hoppers away too as there are only 3 of us today.
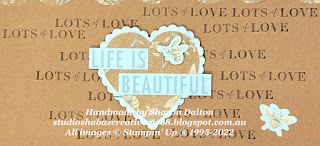

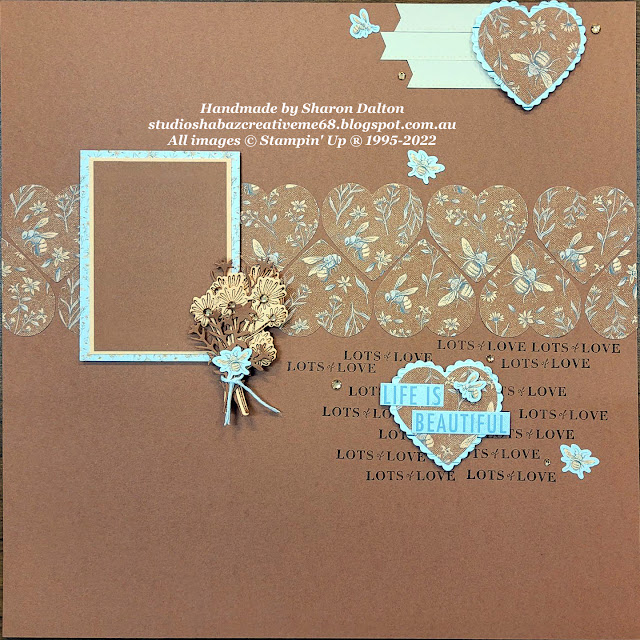
My layout is very simple, I initially thought that I would do lots of layering...
BUT I decided against that and went with the simplicity.
Using a soon to be retiring colour of Cinnamon Cider, which I LOVE!!!

I started with my 12x12 Cinnamon Cider cardstock
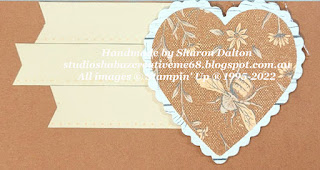
Next I used Heart & Home DSP in the Cinnamon Cider colour with the bees on it
from which I punched out with the 14 Hearts with the Heart Punch pack.
I layed them across my layout, and the whole layout started from there.
Some I used on the top of the scalloped heart punch.
Using the Heart & Home Memories & More Card Pack I chose one small 4" x 3" card
which I cut the centre out of to use it for another project as it had the word Celebrate on it.
AND from another one I chose to use the words Life Is Beautiful for my other heart.


In the
Heart & Home Memories & More Card Pack, they have 2 different sticker sheets
which I used the banners from it for the top of my layout behind the Scallop Heart Punch...
I want to stamp LIVE, LAUGH & LOVE on it BUT I could not find my Beautiful You stamp.
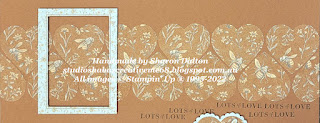


Lots of Love stamp comes from Celebrating You Stamp Set from the Jan-Jun Mini.
I just kept stamping Lots of Love in Early Espresso ink all over
the area to create a visual point as this page will have a photo of me and my husband on it...

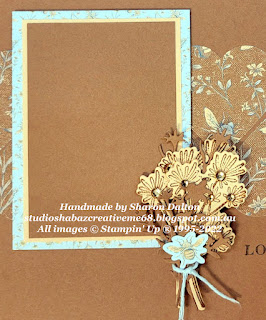
Next I stamped and die-cut several small dandelion bouquets as well
as some of the dies that co-ordinate with the Honeybee Home Stamp Set
and Honeybee Bloom dies.
All of these dandelions and sprigs were then stuck together
to create a bouquet for the side of the photo mat.
I added some Champagne Rhinestone to bling it up
to hold it all together I tied a simple piece of twine around it.


Next I added the bees which were from the sticker sheet to complete the layout.

Thanks for following along on the Blog Hop, please remember to leave me some LOVE
by simply leaving me a comment...
Up next is Jo Blackman


Roll Call

Jo Blackman

Dorothea Winkler

Sharon Dalton


Monday, 21 February 2022

Kre8tors Blog Hop - February 2022 - Sale-A-Bration


Welcome to Kre8tors Blog Hop, Sale-A-Bration

It has been a while since I have hopped with this group
BUT I am glad to be back creating alongside lots of talented Demo's around the world.
You may have clicked on my link that I shared or you are following along with the HOP.
Or you may have came from
Angie McKenzie  Blog...
So glad you joined us....

We are showcasing all things Sale-A-Bration related...


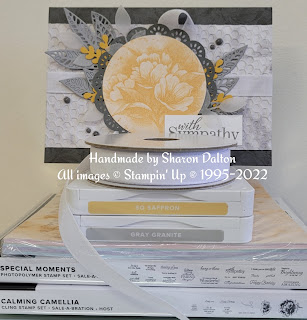
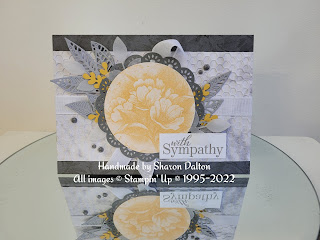
I chose to ink up the Hostess Set - Calming Camellia Cling Stamp Set
which you get for FREE when you host a party or with a $500 order.
Get a group of your friends together and you will be surprised how
quick you can earn this beautiful stamp set...
Ask me how you can get your FREE set until the 16th of March here in Australia.


Also other Sale-A-Bration products that I used were
Simply Marvelous 6"x6" DSP
Special Moments Photopolymer Stamp Set

Other products from the 
Stampin' Dimensionals         Stampin' Cut & Emboss machine


As well as products from the

I chose Bumblebee and Basic Gray 6" x 6" Simply Marvelous DSP        for my card.

The Bumblebee DSP I stamped the Camellia with So Saffron Classic Stampin Pad Ink then diecut with 2nd largest of layering circle dies.

The Basic Gray DSP was run through Stampin' Cut & Emboss machine inside the Hive 3D Embossing Folder

I chose to use a Basic Gray Card base which I stamped the smaller bloom from the Calming Camellia in Gray Granite Classic Stampin' Pad ink to have something on the background behind the DSP panel.

Next I added some white ribbon to the Hive Embossed piece of DSP, then stuck this to my card base.

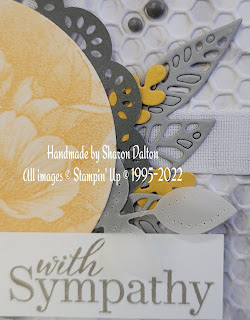
 I chose a couple of different foliage die sets to use behind my stamped Camellia piece of DSP.

Die cut lots of pieces from Artistic Dies, Pierced Blooms Dies and
Floral Heart Dies
in Gray Granite, Bumblebee and Vellum cardstock.

Before layering all these die cut pieces I added a Basic Gray Doily from Heart & Home suite behind the Camellia stamped piece.

Layering another piece of ribbon behind the Doily and then I added all the die cut pieces bit by bit to create some texture to this card.

I did a large cluster of die cut pieces on the top left hand side and a smaller cluster on the bottom right hand side.  Layering with glue dots on different pieces of die cut.

Then adding Stampin' Dimensionals to back of our circular stamped floral piece to add to our card. 

The sentiment 'With Sympathy' was stamped in Gray Granite, then stuck to the front of the circular floral piece.

Lastly I added some Basic Gray Classic Matte Dots on the Hive 3D Embossed piece.

I am very happy with this card, I think I will be making some more in other colours for different occasions...


I hope you enjoyed my project for this Sale-A-Bration Blog Hop.

Up next is Amy Krucek with her gorgeous creation, please follow the rest of the Blog Hop either by the NEXT button or the links below.

Thank you for Hopping around with this hop, please leave me some Lovin' in the form of a comment and will do the same as you.  Cheers Shaz


Roll Call List


Melissa Tennison (US)

Libby Fens - Libby Stamps (US)

Tricia Butts (US)

Angie McKenzie (US)

Sharon Dalton (AU)

Ann Krucek - Corner of Plaid and Paisley (US)

Amy Grendel (CA)

Deb Naylor - The Flying Stamper (US)

Kirsteen Gill (US)

Jacqui Lawrence (UK)

Laura Mackie (UK)

Annette Ball (CA)

Kristie Wilson (US)

Jan Musselman (US)

Dana Sullivan - The Stampin' Chic (US)

Cheryl Taylor - Stampin n Crafting with Cheryldiana (UK)


Sandra Roberts (UK)

Annette Elias - De Kijkkast (NL)


Thursday, 17 February 2022

Scrapbooking Global - Stampin' Up! February 2022 Blog Hop - Happy Birthday


 Sneak Peak of My Birthday layout


 Welcome everyone to Scrapbooking Global Blog Hop for February....
We would LOVE to get more of our community creating Scrapbooking
and joining our monthly Blog Hops...
If you are not part of the Scrapbooking Global - Stampin' Up! Group join us here.


Julia Quinn is our Creative Design Team Member who picked this month's theme.
Her layout is ABSOLUTELY STUNNING, Very Vintage <3
Happy Birthday Julia <3


February is my birthday month too so Julia's theme worked perfectly
for the creatvity to flow into a block themed layout..

4 of us from the Creative Design Team have our Birthdays in February
AND I know at least one of our participants today is celebrating on Monday....


Very simple design today...
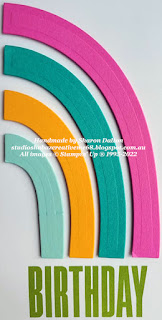
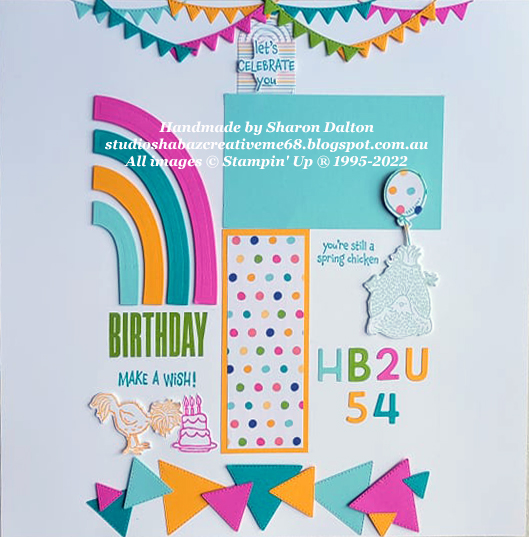
Bright Banners, Rainbows, Triangles and Chickens - What a combo!!!

 
Products I chose to use were the following from both
our Annual Catalogue and Mini Jan-June Catalogue.
As well as FREE product from Sale-A-Bration brochure.

Cardstock and Inks
Bermuda Bay
Mango Melody
Magenta Madness
Pool Party
Granny Apple Green

Stamps & Dies
Biggest Wish
Hey Birthday Chick
Birthday Chick
Party Penguins
Playful Alphabet
Stitched Triangles
 
Sale-A-Bration FREE products
Sunshine & Rainbows DSP
 
How do you start your layouts???
Do you follow a Sketch or a Layout that you have saved from Pinterest.
This morning I started my layout, finished it before going to the DR's
BUT didn't get to finish my Blog post before going LIVE.

I don't always know which design I will follow for my layout...
I just knew that I wanted a rainbow and the birthday chick stamp set.
Most times I leave my layout to the very last day as I know I don't have time
to dilly dally or keep changing my mind...SOOOOO

 I started off drawing up the box in the middle of the layout
to get my panels all in alignment...BUT
I decided that I didn't need to keep those drawn lines around each panel...
Tell me what you think? Do I need to define each box and element.

 
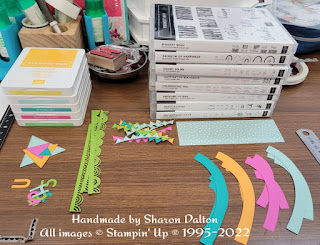
There was quite a lot of die-cutting for this layout
LOTS of bright and funky colours...
Lots of stamps too...


Sooo I have been rambling on,
you are probably sick of waiting so here is the completed layout...
Not much to tell you about how I made it, it is pretty self explanatory.
I hope you like my layout and you are inspired to create something similar
please share it in our Scrapbooking Global - Stampin' Up! community.


Please follow along with the NEXT button which will take you
Cheryl Taylor
If for some reason the NEXT button doesn't work follow along
with the list at the bottom of the blog post


Also please everyone some love in the form of a comment,
we LOVE creating and sharing our creations with you.
Thank you for reading my post...
Cheers Shaz

Sunday, 6 February 2022

ESAD February Mini Catalogue & Saleabration Blog Hop

Sunshine & Rainbows 6" x 6" DSP

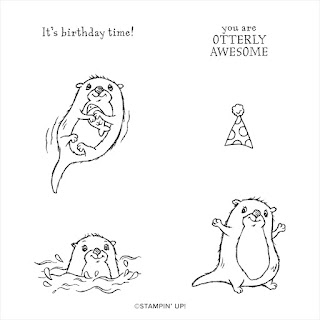
Awesome Otters

 Welcome to ESAD February Mini and Sale-A-Bration Blog Hop.

We are a group of 12 Stampin' Up! Demonstrators whom are showcasing products from our Jan-Jun Mini Catalogue and our SAB - Sale-A-Bration brochure.

My name is Sharon (Shaz) aka CreativeMe68 from Studio Shabaz

I have chosen to showcase two products from SAB catalogue. AWESOME OTTTERS and     Sunshine & Rainbows 6" x 6" DSP.

For every $90 purchase from any of our current catalogue you can pick a FREE SAB item.


THANK YOU for joining the Blog Hop page OR You may have joined by following on from Rochelle Laird-Smith.

Rochelle Laird

Check out her creations by clicking the link above


 These cards started out from a cutting template from a friend who shared how she stamped 3 different images on 3 different coloured cardstock, cut them up and then created 3 cards.

Sale-A-Bration products used were
Sunshine &Rainbows 6" x 6" DSP 158126
Awesome Otters Cling Stamp Set 158087

Annual Catalogue products used

Coastal Cabana Cardstock
Sahara Sand Ink pad
Coastal Cabana Ink pad
Crumb Cake Combo
Smoky Slate Combo
Pool Party Combo
Colour Lifter

Messages Dies
 Rhinestone Basic Jewels

 Coastal Cabana Card Base is 14.8cm x 10.5cm

Rainbow DSP 14.5cm x 10.2cm

Misty Moonlight, Mango Melody & Granny Apple Green DSP 14.2cm x 10.2cm

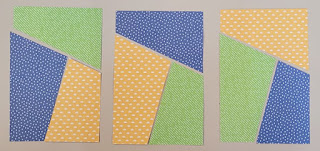
Then chop these 3 pieces of DSP in  guillotine at the same time, angled cuts....

Your 3 cards should look like this

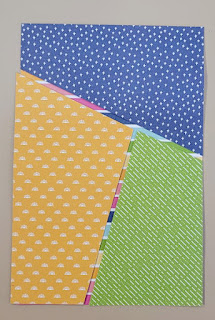
Next I added the angular cut DSP to the Rainbow DSP leaving a slight gap between them, you may have to trim slightly off one side and bottom if they don't align.
 

Watch Monica's video below

Monica Formosa video from World Card Making Group

Monica's card


I needed Birthday cards so I decided to add clouds, rainbows and otters to the front of this card.
Otters were stamped in Sahara Sand and coloured with Crumb Cake and Smoky Slate Blends.
 
Clouds and Rainbow were all fussy cut from FREE Sunshine & Rainbows DSP as I don't YET own the cloud punch or dies...

Sentiment was stamped on Basic White cardstock scrap with Coastal Cabana Ink pad. 
 
I added the coloured dots from the rainbow dsp to the otters hats


Lastly I added some Rhinestone Basic Jewels to finish off the cards.
 
 I only have 2 of the 3 cards to show as a 4yr apparently needs her card more than I do!!!


Up next is Denise Buetler with her
creations for our Blog Hop.


 I hope that you liked my cards, please leave me some love in the form of a comment to let me know what you think.


Thursday, 20 January 2022

Scrapbooking Global - Stampin' Up! January Blog Hop - Decorative Borders


Just a lil sneak peak...


 Welcome to January Blog Hop,  
Each month
one of our Design Team picks a Theme to challenge our creativity.
We’d love it if you join us each month! We usually hop the 3rd Thurs of the Month.
Sherry Roth picked this month's theme of Decorative Borders.


 I can only imagine that Sherry's Scrapbook design will be something AMAZING
as she's very creative with her style.
We have quite a full line up for this hop with 12 of us hoping this month.
Cannot wait to see all the designs from the talented ladies.


 So mine started out this morning with just using the Heart & Home Suite
using the doiley's as my border design...
Then I decided it needed some more elements to create a decorative border.
Adding a strip of DSP of the wood pallet design from the matching papers
BUT I felt like it still needed something else so I added 2 strips
cut from the Memories & More Cards and Envelopes.
Then I added some of the beautiful matching Denim ribbon to the layers...
    Once again looking at my border design I felt like it was lacking a lil lil something.
So I cut up some more doiley's to the already created border.
Finally I was happy with my border design.


So then come the designing of the rest of the layout...
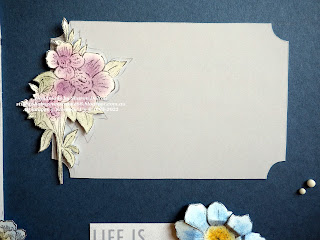
Sticking with this suite I chose to stamp the largest image from
Blessings of Home Cling Stamp. 
The florals on this stamp are just devine!!!
Wanting to add just a bit of colour to this layout on the flowers
I used the Soft Pastels Assortment with versamark and the different colours from the palette.
None of these colours from the  are in the background colour of Misty Moonlight
BUT they added just what I wanted.


How you lay down your colour on your Basic Gray image.
Using a dauber you firstly add versamark to the dauber and dab that on the part
of the flower that you want to colour a specific colour...
As the versamark dries quickly you need to work in small sections
and add the colour from the soft pastels (which I just scrap with a metal ruler)
onto my silicon mat in different areas.


Here is one of our talented Creative Design Team member using pastels
Check out this video from Sharni Haines she shows you how she used the pastels.

I also wanted to add some dimension to the centre bloom of the floral cluster.
So I stamped out 3 more centre petals, coloured with the Night of Navy
and pollen centre with Daffodil Delight pastel cut that away.

Creasing and folding the petals to give the flower some more dimension
the adding Mini Stampin Dimensionals to give that lift.
Then I added the pollen centre of the flower with some more dimensionals.

Adding to the decorative border theme, I cut the centre out of
one of the cards from the Memories and More pack...
This became my frame for my photo and the inside of it
became my journalling block.


Using another Memories and More cards for the title,
I simply just cut the word away from the card and added another flowers


I do hope that this inspires you to try this technique in one of your future projects.
Not really sure what the technique called.

Up next is Delys Cram with her layout, I am wondering what Delys has used for this theme.
No matter what she does, it is always AWESOME!!!


 Thanks for joining me and the team.
Please leave me a lil bit of loving in the form of a comment
Have a Great Day, hopefully it involves scrapbooking.
Cheers Shaz