Monday 27 February 2023

Ink & Share Scrapbook Blog Hop - February 2023 - LOVE


 Welcome to Ink & Share Scrapbook Blog Hop.
We are an international group of Scrapbookers from all around the globe.
It's been a while since I joined a hop, so I am keen to
rekindle my LOVE of Scrapbooking and thought what better way to jump back
in was with a LOVE Theme.


I chose to use the Hello, Irresistible 6 x 6 DSP Irresistible Blooms from the Online Exclusive.
These products will be available from March 1 until they sell out.
This DSP is just pure magic, the art work that designer has created
with all the flowers and leaves that are printed and they have matching dies
to cut them out with your Stampin' Cut & Emboss machine.

Sooo no fussy cutting, which I actually LOVE. So all the hard work done for you.

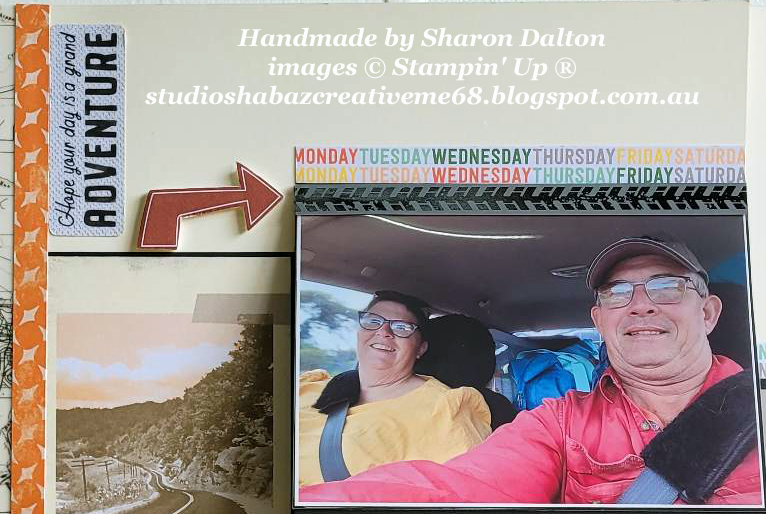
I chose a layout from Pinterest to case.


Those who know me well, know that I LOVE Designer Series Paper.
I love that our DSP co-ordinates with everything Stampin' Up! has to offer.
So NO Stamping on this layout for me...


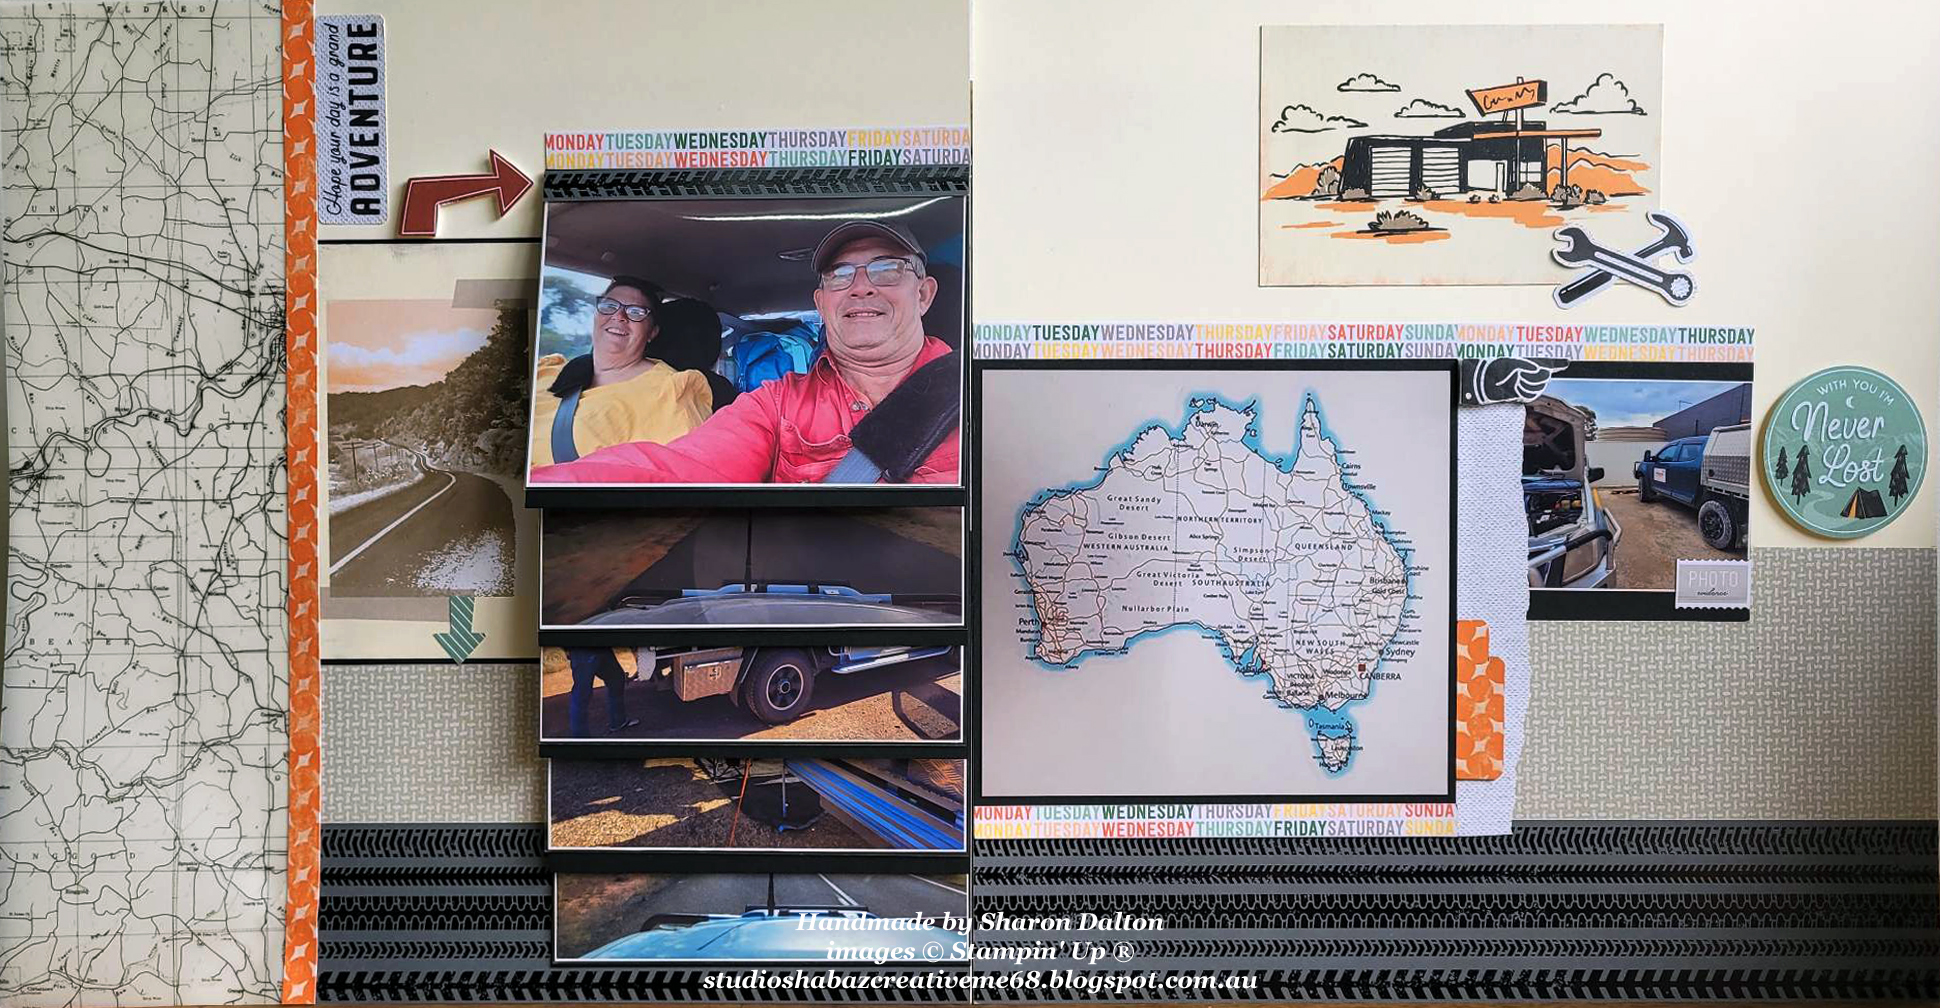
Sooo I used a couple of different DSP's to create this layout
Design A Daydream 12 x 12 DSP from the back of the Annual Catalogue as a Host reward
The Irresistible Blooms 6 x 6 DSP - Online Exclusive March 1 release
AND some of the Beautiful Texture Chic 12 x 12 DSP
along with the matching Texture Chic Memories and More Card Pack
The Distressed Gold 12 x 12 Specialty Paper

 Other products I used were
Love For You Bundle
Penned Flowers Dies
Irresistible Blooms Dies
Retired Gold Adhesive Backed Swirls


The photograph is layered onto a small piece of Petal Pink, Design A Daydream 12 x 12 DSP
Then bordered with Mango Melody cardstock.
I created a FAUX pocket under the photo so that I could 
add hidden journalling on the pull tab of Moments.
I just used the Foam Adhesive Sheets to create the gap
for the journalling to slide in and out of.
The Hello, Irresistible flowers and the Tag are not actually stuck to the photograph
they are just sitting over the edge and they are stuck with some more of the
Foam Adhesive Sheets outside the perimeter of the photograph.


I saw that the original creator had used her sewing machine by the look of it.
BUT we have a stitched border in the Penned Dies and I just
used that to create the faux stitching lines on my Petal Pink layer.
Also I used that same die for my stitched scalloped border out of Calypso Coral.

All the layers to form the central design element.
Small pink floral background DSP is from
Design A Daydream 12 x 12 DSP
Flirty Flamingo layer of cardstock (which I cut out the excess, very frugal)
Petal Pink layer of cardstock with the faux stitching
Small strip of
Texture Chic 12 x 12 DSP
Stitched scallop border die in Calypso Coral cardstock.

All the coloured flowers and the printed leaves are cut from Hello, Irresistible DSP
The diecut leaves are cut from Evening Evergreen cardstock.
Lots of lovely layered flowers using the Foam Adhesive Sheets again to create layers.
Also you will see some Gold leaves these are from the sticker sheets
in
Texture Chic Memories and More Card Pack.


The So Much More is diecut from The Distressed Gold 12 x 12 Specialty Paper
with the Love for You dies from the Mini Catalogue.
I added some
Retired Gold Adhesive Backed Swirls to finish off with the golden touch.


 This was so much FUN, so glad to be back.
Can't wait to do more scrapbooking in 2023

Thanks for following along with the blog hop there are 6 of us,
who all are beautiful artisans and we all have our own style.

Please HOP along now to Cindy's Blog and she what she created.
AND please follow the blog hop all the way round
and leave us some LOVE in the form of a comment.

Enjoy your day and catch you next time.
Cheers Shaz


Sunday 19 February 2023

ESAD - Sale-A-Bration Blog Hop


Welcome to ESAD Sale-A-Bration Ending Soon Blog Hop.
We are a group of ESAD Demonstrators who want to showcase the FREE* products
from Sale-A-Bration catalogue that ends on the 28th of Feb. 
FREE* with any purchase of $90 or $180 products from any CURRENT Catalogue.
I am sure that the 7 of us who are participating in this Blog Hop will inspire you
with the products that they have chosen to use on our projects.


I chose to use a product that Stampin' Up! gave us as part of the Nov OnStage event in Perth.
Inside the contents of our SWAG Bag, were a couple of NEW Stamp Sets.
I am using the Photopolymer Stamp Set - Beautifully Happy
FREE* with $180 purchase, HURRY you don't have much time left to secure yours.
This is one of the benefits of being a Stampin' Up! Demostrator, you get access to
NEW products ahead of a launch of the upcoming catalogue.
Anyways I am getting sidetracked, BACK to the product that I am using.


With Stamps, Ink and Paper at the ready.
I have chosen to use the colours in a Color Inkspiration Challenge.
I need to upload this tonight as I think this challenge finishes Mon 20th.


I started off by just stamping the images as they are designed as a 2 Step Stamp Set.
Firstly Stamp the outline image in Evening Evergreen, then with the Distinctive filler images.
I stamped off Polished Pink, so that I got 2nd generation ink on the petals.
Next I stamped off Orchid Oasis to fill in the leaf image and then
I used stamped off Balmy Blue on the small foliage image at the top.
Lastly to bring the Evening Evergreen into the image I used the small dottage stamp
with 2nd generation ink on it to add detail around the stamped images.


 I felt as though it was lacking something so I grabbed a Blending Brush,
do you know that we now have Large and Small Blending Brushes.
With the Blending Brush I added some Balmy Blue over the whole image.


Then I added some Polished Pink ink to a block and used a old almost empty
Wink of Stella brush to add some glimmer to the Polished Pink flower.

Then I was like this is too plain and simple, in TRUE Shaz style I had to step it up a bit.
I used the Organic Beauty Dies which can be found on pg 166 of the Annual Catty.
To Die cut image with the Lattice background from these dies.

BUT I still wasn't happy with it, what can I do with this now.
I die cut Basic White cardstock with the Lattice background die
then layered that over the Balmy Blue Cardstock base card
and added some Orchid Oasis to a block using a Blending Brush
I added ink over die cut creating some interest in the background.
It is only very light so you can't really see it but if you look closely you can see it.


 With the Stamped Basic White cardstock Lattice background die in place I added the cut
out sections of just the floral piece back onto my card with a small amount of glue.
Piece by piece I added them into the lattice and got a look I was finally
happy with for this card.  I know I am a fuss pot.


NEXT I added some Self Adhesive Sheets to the back of a piece of the Spotty Vellum
out of the Vellum Basic 12x12 Speciality Designer Series Paper from the Mini Catalogue.
I added the adhesive sheets so that I could die cut the Lattice background die
and peel the backing off to secure it over the background.

Happy Now, who am I am going to send this card to...Well I am not really sure.
I thought I would use Thank You from the same stamp set, stamped on the Balmy Blue CS
with Evening Evergreen and then I added a leftover piece of sticky vellum.
You never know when you might need a Thank you card.


Now I try to always decorate the inside and the envelope with the stamp set.
All matchy, matchy makes my heart happy.
So I used the Orchid Oasis again with the Blending Brushes on the
lattice die cut to add some interest on the inside.
Then I stamped the floral image again following what I did for the front.


Here it is all finished with Orchid Oasis 1/8" Metallic Woven Ribbon
and Blue For Everything Fancy Sequins.
AND a matching Envelope.


Up NEXT is the Talented Lou Kitzelman with her version
of Sale-A-Bration products to tempt you with.


Blog Participant List


1.       Lou Kitzelman

2.       Nicole Wilson

3.       Denise Buetler

4.       Cheryl Algie

5.       Bronwyn Eastley

6.       Tracy Held

7.       Sharon Dalton


 Thank you for visiting my blog, us on the ESAD Blog Hop,
please leave us some LOVIN' in the form of a comment
We so appreciate your visit....
Don't forget to click on the NEXT button to view all the other blogs.

Cheers Shaz


*SHOP IN MY ONLINE STORE 

* JOIN MY TEAM - INK'N UP 

*VIEW ANNUAL CATALOGUE 2022-2023

*VIEW JAN-APR 2023 MINI CATALOGUE


Thursday 16 February 2023

Scrapbooking Global - Feb 16 - Travel Blog Hop


Welcome to the Scrapbooking Global - Stampin' Up! February 16, 2023 Blog Hop.
 This months theme is Travel and Sharni Haines is our Creative Design Team Member
who chose this theme. I am so excited to see the Travel Scrapbooking Layouts from
everyone who is participating this month.


Thank you to those of you who come back month after month,
we are Thankful that you keep creating AMAZING layouts for our themes.
If you would LOVE to join the FUN,
simply join Scrapbooking Global - Stampin' Up! FB group
where there is so much inspiration for any theme.
If you don't have a Blog that is OK too, you can still create a layout
and you can simply add them to the Album on the FB page.

My layout is very late, NO EXCUSES just didn't get it finished on time.
Still can't think of a Title, Here is the Sub Title.


I created a Double Layout with Paper products and Memories & More Cards
from both the Annual Catty and our Current Jan - Apr Mini Catty.
We have so many AMAZING products that co-ordinate with other products in our range.

I knew that I wanted to use the wheel tracks/chequer plate
on the DSP
from Ready to Ride 12 x 12
as the main feature.
You see we were traveling half way around Australia to meet our 1st Grand Daughter.
Our trip took us through 4 States in Australia and we travelled over 5,000
klms to get to finally meet her in Margaret River.
We travelled a grand total of over 11,400 klms round trip.

Also using He's The Man 12 x 12 DSP and die-cut elements
and Vellum 12 x 12 Layering Designs.
These all featured throughout the layout and suited our Travel theme PERFECTLY!!!

I used an old sketch page map to create the design of the layout from one of the first
scrapbooking books I ever purchased way back in my early days.
I find that they help me create if I am struggling without a design plan.


As you can see on this LHS layout page I have left room for journalling on
Sahara Sand piece of DSP under that Mint Macaron arrow and
Hope Your Day Is A Grand Adventure are from the
die-cut elements in the He's The Man DSP.

The MON - SUN above the photos comes from our Memories & More Card Pack
Today Is The Day, which I have just cut up and used on the layout.

AND the side panel uses the Map Vellum 12 x 12 Layering Designs,
I will add an appropriate Title here once I have a bit more of a think.

I have included 5 photos in a waterfall feature on this layout,
you can only partially see the photos from this angle of the page.
I wanted to add quite a few photos to this layout,
that mean a lot to me BUT not to the general public.
On the back of the photograph I have a piece of black cardstock
so that you can lift them to see each photo.

I used the Clear Medium Envelopes on pg 137 as protectors for my photographs.


On The RHS I have got 1 large photo and 1 small photo.
This for me is about teaching me about perspective,
to focus on the bigger picture and not to focus on the minor setbacks.

You see we had a breakdown on our way across to Western Australia.
Which made me very upset as all I wanted to do was meet Eloise.
So an extra 2 days sitting waiting for the part to arrive to fix our ute
made me appreciate the time that we had together as a couple at our
current location...Penong, South Australia. Which was AMAZING

 Finally we got our Ute fixed and off we set off across The Nullabor,
BUT those photos will be in another Scrapbooking layout.
Here is the almost completed layout, just need some help with the Title.


This lil tab with the chequer plate is a pull out calendar
to remind me of where we were during those 7 days of travel
from Gogango, Queensland to Margaret River, Western Australia.


I hope that you liked my layout, even though it is not complete.
Just a few more items to be added and it will be finished.

Thank you for joining us on the Travel Blog Hop.

Up next is the talented Courtenay Heuston with her layout.
Please remember to hop along to each persons blog simply
by clicking the NEXT button or following the links below.

Once again, Thanks for HOPPING by and reading our Blog Posts
we really appreciate that you take the time to read them.

Looking forward to next month's theme, until then
stay safe and EXIST IN PHOTOS.
Cheers Shaz